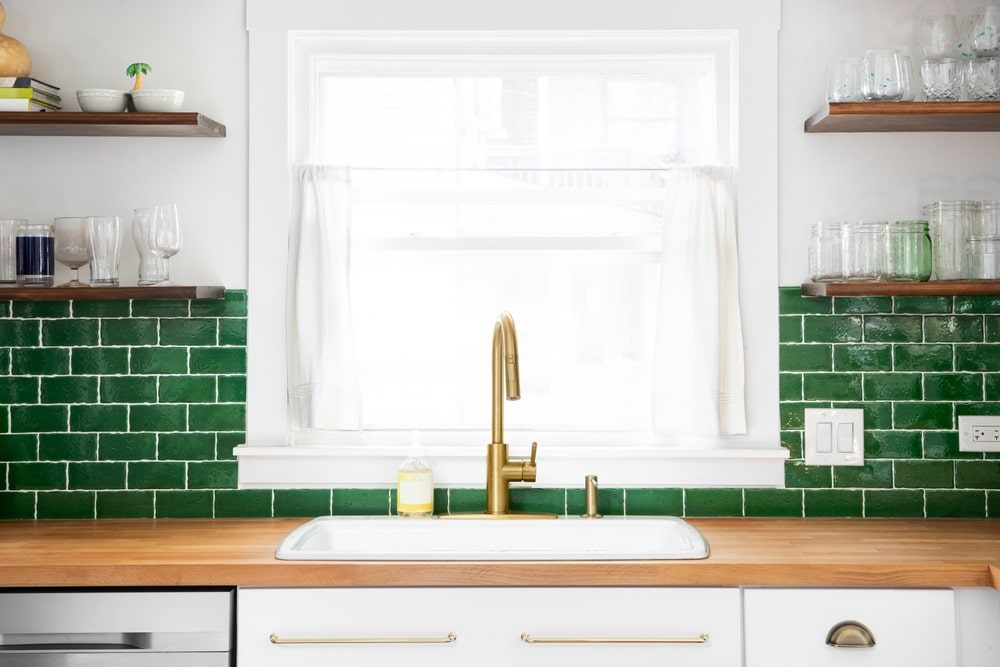
How to Install Butcher Block Countertops
Learning how to install butcher block countertops can completely transform the look and function of your kitchen. Butcher block adds natural warmth, style, and durability, making it a popular choice for homeowners who want a unique, functional workspace. Whether you’re a DIY enthusiast or considering professional help, understanding each step and the key considerations will help you achieve a flawless installation. The experts at Unique Kitchen and Baths are here to guide you through every detail and help you bring your dream kitchen to life.
Contents
- 1 Planning Your Butcher Block Countertop Installation
- 2 Cutting and Fitting the Butcher Block
- 3 Securing and Installing the Butcher Block Countertops
- 4 Finishing and Sealing Your Butcher Block
- 5 Common Mistakes to Avoid When Installing Butcher Block Countertops
- 6 Professional vs. DIY Installation
- 7 FAQ
- 8 Conclusion
Planning Your Butcher Block Countertop Installation
Before starting any project, proper planning is essential for a successful outcome when it comes to how to install butcher block countertops.

Take accurate measurements of your current counters and decide if you’ll need to cut out spaces for sinks, stoves, or special features. Plan the placement of seams and joints, ensuring the wood grain runs in a way that is both visually appealing and structurally sound. Budget for additional materials like brackets, fasteners, finishing oil, and caulk.
Tools and Materials You’ll Need
For anyone looking up how to install butcher block countertops, a circular saw, jigsaw, sander, drill, tape measure, clamps, screws, and finishing oil or sealant are basic essentials. Don’t forget safety equipment, such as goggles and gloves, to keep the installation safe and smooth.
Preparing the Space
Clear the work area, remove old countertops, and inspect the base cabinets for level and sturdiness. Address any unevenness or damage before proceeding with your butcher block installation.
Cutting and Fitting the Butcher Block
Properly cutting and fitting is a vital step in mastering how to install butcher block countertops for a seamless, professional result.
Measure twice and cut once! Mark out any sink or appliance cutouts, and carefully follow your lines with the appropriate saw. Dry-fit each piece in place before fastening to ensure every joint lines up perfectly. Sand all cut edges smooth, paying special attention to corners and sink openings.
Making Accurate Sink and Appliance Cutouts
Trace your sink or cooktop template onto the butcher block and use a drill to start the corners. Follow up with a jigsaw for clean, precise cuts. Always double-check measurements before cutting.
Adjusting for Walls and Cabinets
Older homes may have walls that are not perfectly square. Use a scribe tool to trace the wall’s profile onto your countertop for a snug fit, and trim as needed for a custom appearance.
Securing and Installing the Butcher Block Countertops
The next phase in how to install butcher block countertops is securing the wood to your cabinets and ensuring a sturdy, long-lasting fit.
Once the butcher block is cut and dry-fitted, attach it to the cabinet base using screws from underneath. Use slotted brackets or washers to allow for natural wood movement, preventing future cracking or warping. Check for levelness at every step, shimming the cabinets if needed. Finally, caulk the seams where the countertop meets the wall or backsplash to protect against moisture intrusion.
Tips for a Strong, Flexible Installation
Allow the wood to acclimate to your home’s environment for a few days before installation. This reduces the chance of expansion or contraction after mounting.
Protecting Your Cabinets and Walls
Be careful not to overtighten screws or fasteners. This helps preserve both the countertop’s appearance and your cabinet structure.
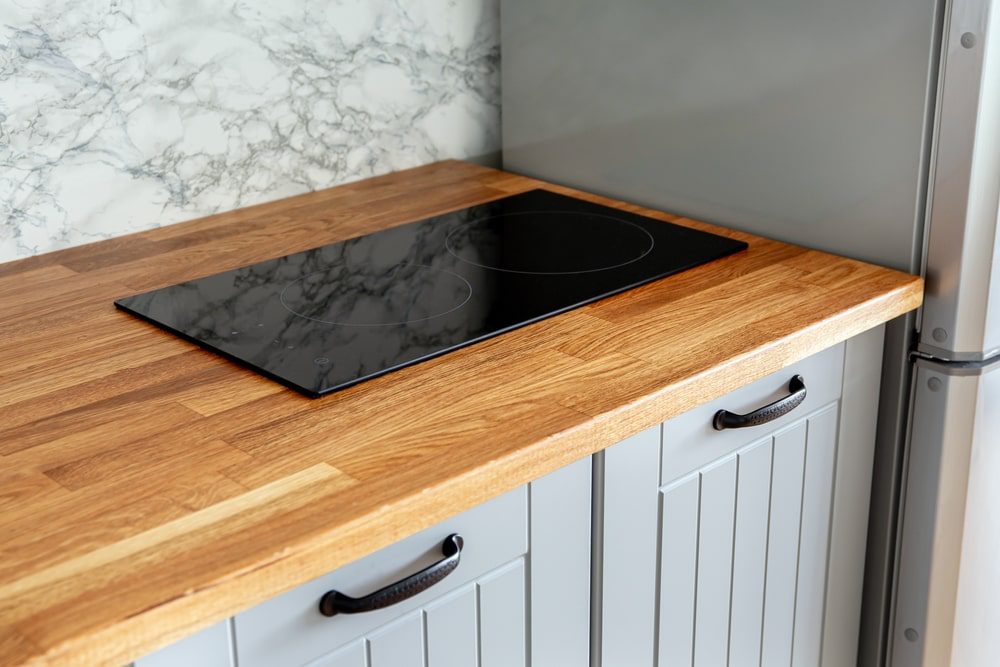
Finishing and Sealing Your Butcher Block
Sealing and finishing are crucial in the process of how to install butcher block countertops—protecting the wood and enhancing its beauty.
Apply a food-safe mineral oil or butcher block conditioner liberally, allowing it to soak in and repeating the process several times for best results. Reapply oil regularly—especially in the first month—to maintain a water-resistant barrier and prevent cracking. Some homeowners prefer a polyurethane finish for extra durability, though it should be fully cured before kitchen use.
Oil vs. Polyurethane Finishes
Oil finishes bring out the wood’s natural character and are easily maintained but require more frequent reapplication. Polyurethane finishes are more durable but create a shinier surface and may require sanding and reapplication over time.
Ongoing Maintenance Tips
Regularly clean your butcher block countertops with a mild soap and water solution. Avoid harsh chemicals or soaking, and use cutting boards to protect the surface from knife marks and stains.
Common Mistakes to Avoid When Installing Butcher Block Countertops
Understanding pitfalls is part of truly mastering how to install butcher block countertops and achieving a flawless look.
Mistakes like skipping the acclimation period, failing to allow for wood expansion, or improper sealing can lead to cracking, warping, or water damage. Rushing the installation can also result in misaligned joints and uneven seams, which will impact both the beauty and lifespan of your countertops.
Allowing for Wood Movement
Wood naturally expands and contracts with temperature and humidity. Always use slotted screw holes or brackets so your countertop can move slightly without stress.
Ensuring Even Finishes
Take your time when sanding, staining, and sealing to avoid uneven color and finish. Multiple light coats always yield better results than one heavy application.
Professional vs. DIY Installation
One important consideration with how to install butcher block countertops is whether to handle the project yourself or hire an expert.
While many handy homeowners achieve great results on their own, professional installation can guarantee a flawless look, especially for large or complex kitchens. Experts bring experience, specialized tools, and can tackle challenging layouts or unique design requests, giving you peace of mind.
When to Hire a Professional
If your kitchen includes challenging angles, large sink cutouts, or integrated appliances, a professional installer may be the best choice for precise results.
The Value of Expert Craftsmanship
Unique Kitchen and Baths provides top-quality installation services with attention to every detail, ensuring long-lasting performance and a beautiful finish that enhances your entire space.
FAQ
UKB
Unique Kitchen & baths is a family-owned business that is committed to providing high-quality kitchen and bathroom remodeling, as well as flooring installations at affordable prices.