How to Repair a Fiberglass Bathtub: A Complete Step-by-Step Guide
Fiberglass bathtubs are durable, lightweight, and affordable, making them a favorite in many modern homes. However, over time, they can develop cracks, chips, or dull spots from wear, heavy impacts, or age. Knowing how to repair a fiberglass bathtub properly can save you from expensive replacements and keep your bathroom looking pristine.
In this detailed guide, we’ll cover everything from identifying damage to using the right materials, achieving a professional finish, and preventing future issues—all using proven methods trusted by the experts at Unique Kitchen and Baths.
Contents
Understanding Fiberglass Bathtub Damage
Before diving into how to repair a fiberglass bathtub, you need to know the type of damage you’re dealing with. Each issue requires a slightly different approach and set of materials.
Hairline Cracks and Surface Fractures
These are shallow imperfections caused by stress, flexing, or rapid temperature changes. While they may seem minor, they can worsen if left untreated, allowing water to seep beneath the surface and cause hidden damage.
Deep Cracks and Structural Damage
A deeper crack typically indicates that the fiberglass layers have separated or weakened. These often occur in the center of the tub floor or areas that flex under weight. Repairs require reinforcement with fiberglass mat and multiple layers of resin.
Chips and Gouges
Surface chips can happen from dropping heavy objects or cleaning with harsh tools. Although they don’t usually cause leaks, they affect your tub’s aesthetics and can be easily fixed using filler compounds and color-matched finishes.
Tools and Materials You’ll Need
Having the right tools and repair materials on hand is key when learning how to repair a fiberglass bathtub effectively. Gather the following:
- Fiberglass repair kit (includes resin, hardener, and filler paste)
- Fiberglass mesh or mat (for reinforcement)
- Sandpaper (80, 120, and 400 grit)
- Acetone or rubbing alcohol (for cleaning)
- Mixing container and stir stick
- Utility knife or Dremel tool
- Disposable gloves, goggles, and respirator mask
- Gel coat or bathtub refinishing paint (optional for finish)
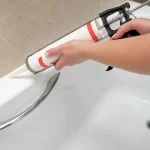
Choose a well-ventilated area for repairs, as fiberglass resin emits strong fumes during application and curing.
Step-by-Step Guide: How to Repair a Fiberglass Bathtub
Follow these detailed steps to restore your fiberglass bathtub to its original, smooth condition.
Step 1: Clean and Prepare the Area
Clean the damaged surface thoroughly with warm, soapy water and a soft cloth. Remove all soap residue, oils, and debris. Wipe with acetone or rubbing alcohol to ensure a clean surface. Once dry, use 80-grit sandpaper to lightly roughen the area around the crack or chip, which helps the repair compound bond more effectively.
Step 2: Widen and Shape the Crack
If the damage is a deep crack, use a Dremel tool or utility knife to slightly widen it into a shallow “V” shape. This helps the resin and filler adhere deeper into the damaged area for a stronger repair.
Step 3: Apply Fiberglass Mesh (for Deep Cracks)
For larger or structural cracks, place a small piece of fiberglass mesh or mat directly over the crack. This adds strength and prevents the damage from spreading.
Brush a thin layer of mixed resin over the mesh and allow it to saturate completely. Smooth it with a plastic spreader or small brush to remove air bubbles.
Step 4: Mix and Apply the Filler Compound
Following the instructions on your fiberglass repair kit, mix the resin and hardener in the recommended ratio. Apply the mixture into the crack or chip using a plastic applicator. Build up the area slightly above the surface level to allow for sanding later.
Step 5: Allow to Cure Completely
Let the repair cure for 12 to 24 hours, depending on temperature and humidity. Avoid using the bathtub during this time. The resin should harden completely before sanding or painting.
Step 6: Sand the Surface Smooth
Once the resin has cured, begin sanding with 120-grit sandpaper to level the repair. Gradually move to finer grits (400-grit) for a smooth, even finish. Wipe away dust with a damp cloth.
Step 7: Apply the Gel Coat or Finish
To blend the repaired area with the rest of your bathtub, apply a color-matched gel coat or refinishing paint. This step restores shine and provides waterproof protection. Let the final coat dry thoroughly before using the bathtub again.
How to Match the Color for a Seamless Repair
A common concern when learning how to repair a fiberglass bathtub is ensuring the repair doesn’t stand out. Matching the color is easier than you might think.
Using a Color-Matched Gel Coat
Most fiberglass repair kits include a small amount of white or off-white gel coat. You can tint this with pigments to match your bathtub’s color exactly. Apply two thin layers, letting each cure before applying the next, for a polished finish.
Blending Edges for a Smooth Transition
After applying the gel coat, lightly sand the edges with fine-grit sandpaper to blend the new finish into the existing surface. A small amount of polishing compound can help even out the gloss.
Safety Precautions When Repairing Fiberglass
Working with fiberglass resin and hardener requires care and ventilation. Follow these essential safety tips to ensure a smooth and safe repair experience.
Work in a Ventilated Area
Always open windows and use an exhaust fan or mask to avoid inhaling fumes. Fiberglass resin releases strong odors and can irritate eyes or lungs.
Wear Proper Protective Gear
Use gloves, goggles, and a respirator mask. Fiberglass dust from sanding can irritate skin and respiratory passages, so clean up thoroughly after sanding.