How To Plan Electrical And Lighting Changes In Kitchen Remodel
Electrical planning is one of the least visible parts of a kitchen remodel, yet it controls how well the finished room works. A beautiful kitchen can become frustrating when the coffee maker and toaster compete for one outlet, a pendant casts shadows over the island, or a new range requires wiring that was never included in the budget.
The right time to plan electrical and lighting changes is after the layout is developed but before cabinets, appliances, stone, tile, and drywall details are finalized. That timing gives the designer, electrician, cabinet supplier, and remodeler one coordinated plan instead of a series of expensive field decisions.
This guide explains how to build that plan around real kitchen habits while leaving the final circuit design, load calculations, code interpretation, and installation to qualified professionals.
Contents
- 1 The Short Answer
- 2 What Must Be Decided at Each Stage?
- 3 1. Start With the Final Kitchen Layout
- 4 2. Build an Appliance Schedule Before Designing Circuits
- 5 3. Have the Existing Electrical System Evaluated
- 6 4. Plan Outlets by Activity Zone
- 7 5. Treat GFCI, AFCI, and Circuit Rules as Design Inputs
- 8 6. Build the Lighting Plan in Layers
- 9 7. Position Lights From Work Surfaces, Not Room Centerlines
- 10 8. Design Switches and Controls Around Daily Routines
- 11 9. Coordinate Island Power and Pendant Lighting Together
- 12 10. Lock Electrical Locations Before Cabinets and Finishes
- 13 Permits and Inspections in Mission Viejo
- 14 Common Electrical and Lighting Planning Mistakes
- 14.1 Choosing Fixtures Before the Layout Is Final
- 14.2 Using One Circuit Assumption for Every Appliance
- 14.3 Treating Recessed Lights as Task Lighting Everywhere
- 14.4 Hiding Drivers Where They Cannot Be Serviced
- 14.5 Mixing Color Temperatures
- 14.6 Forgetting Dimmers Until Trim-Out
- 14.7 Finalizing the Backsplash Before Device Placement
- 15 Homeowner Planning Checklist
- 16 Frequently Asked Questions
- 16.1 When should electrical planning begin in a kitchen remodel?
- 16.2 Does a kitchen remodel require a licensed electrician?
- 16.3 How many lighting layers does a kitchen need?
- 16.4 What color temperature is best for kitchen lighting?
- 16.5 Should kitchen lighting use a CRI of 90 or higher?
- 16.6 Can outlets be installed on the side of a kitchen island?
- 16.7 Should electrical wiring be completed before cabinets are installed?
- 17 Plan the Details Before Construction Starts
The Short Answer
To plan electrical and lighting changes in a kitchen remodel:
- Finalize the cabinet, appliance, and island layout.
- Collect the electrical specifications for every appliance.
- Have a licensed electrician evaluate the existing panel and calculate the proposed load.
- Map outlets around specific countertop and appliance zones.
- Separate ambient, task, decorative, and accent lighting.
- Position fixtures using the actual work surfaces, not the center of the room.
- Group lights into useful switch and dimmer zones.
- Coordinate island power, floor penetrations, and pendant locations.
- Lock outlet positions before cabinets, backsplash, and countertops are fabricated.
- Complete permits, rough-in inspections, and testing in the correct sequence.
What Must Be Decided at Each Stage?
Project stage | Electrical and lighting decisions | What goes wrong if delayed |
Concept layout | Appliance locations, island position, major work zones | Circuits and fixtures are designed around a layout that later changes |
Design development | Appliance model numbers, outlet zones, lighting layers, control locations | Panel capacity, dedicated circuits, and cabinet integration remain unknown |
Before cabinet order | Exact box heights, under-cabinet wiring, hood requirements, charging features | Electrical boxes collide with cabinet panels, drawers, or appliance cavities |
Before countertop and tile fabrication | Island power method, backsplash device locations, pop-up assemblies where allowed | Stone and tile require awkward cuts or costly rework |
Rough-in | Circuit routing, boxes, wiring, drivers, low-voltage provisions | Walls must be reopened after finishes are installed |
Trim and commissioning | Fixtures, devices, dimmers, control programming, testing | Flicker, glare, mismatched color, or confusing controls remain unresolved |
1. Start With the Final Kitchen Layout
Do not begin by counting recessed lights or choosing pendant styles. Begin with a dimensioned plan that shows cabinets, appliance openings, countertop edges, sink locations, doors, walkways, and the island.
Then mark how the household uses the room:
- Where is food unloaded from grocery bags?
- Which counter is used for chopping and mixing?
- Will the coffee maker, toaster, air fryer, or stand mixer remain plugged in?
- Does the island support prep, seating, a sink, or appliances?
- Which entrance is used at night?
- Is there a pantry, beverage station, desk, or charging drawer?
These answers determine where power and light are needed. A reflected ceiling plan and electrical plan should reference the same cabinet drawing. Professional kitchen design planning can help coordinate those layers before the construction documents are released.
2. Build an Appliance Schedule Before Designing Circuits
Create an appliance schedule with the manufacturer, model number, voltage, amperage or wattage, connection type, and installation location for every fixed appliance. Use the manufacturer’s installation instructions and nameplate data rather than assumptions based on appliance type.
Include items that are easy to overlook:
- refrigerator and freezer columns;
- range, cooktop, wall oven, or speed oven;
- microwave and ventilation hood;
- dishwasher and garbage disposal;
- beverage refrigerator or wine storage;
- instant hot-water dispenser;
- warming drawer;
- under-counter ice maker;
- built-in coffee system; and
- smart faucets, leak sensors, or filtration equipment requiring power.
Different products in the same category can have different circuit and connection requirements. Changing an appliance model late may affect wiring, breaker size, ventilation, cabinet clearances, or the location of the outlet. Coordinate purchasing and appliance installation requirements before rough-in.
3. Have the Existing Electrical System Evaluated
Adding an induction range, double oven, microwave drawer, beverage center, and more lighting can materially change the kitchen’s electrical load. A licensed electrician should inspect the existing service, panel, available breaker spaces, grounding and bonding, conductor condition, and any older wiring that will remain.
This review should answer three different questions:
- Capacity: Can the existing service and panel support the proposed loads?
- Condition: Are the existing circuits and wiring suitable for reuse?
- Access: Can new circuits be routed without major demolition outside the kitchen?
A panel with empty breaker spaces does not automatically have enough electrical capacity. The electrician may need a formal load calculation and may recommend a subpanel, service work, or a different appliance strategy. Obtain this information before approving the appliance package and construction budget.
4. Plan Outlets by Activity Zone
Code-compliant outlet spacing is the baseline, not the complete usability plan. Start by identifying where appliances will actually sit and where cords can reach without crossing a sink, cooktop, walkway, or seating area.
Countertop Prep Zones
Provide convenient power where mixers, blenders, food processors, and other portable appliances are used. Avoid placing all usable receptacles behind a single appliance or in a corner that is hard to reach.
Coffee and Beverage Stations
List every device likely to operate at the same time. A coffee machine, grinder, kettle, and milk frother can turn a small niche into a high-demand zone. Confirm circuit needs with the electrician rather than assuming one general outlet is enough.
Pantry and Appliance Garages
An outlet inside cabinetry requires coordination with cabinet clearances, ventilation, device accessibility, and applicable code. Appliances that generate heat should not be enclosed or operated behind closed doors unless the cabinet system and appliance instructions permit it.
Charging Drawers
A charging drawer can clear phones and tablets from the counter, but it needs a listed, serviceable power solution. Plan cable management and heat ventilation so chargers are not buried under paper or utensils.
Floor-Cleaning and General Use
Think beyond countertop appliances. A conveniently located receptacle can support a vacuum, robotic vacuum dock, holiday lighting, or a laptop without requiring an extension cord across a walkway.
5. Treat GFCI, AFCI, and Circuit Rules as Design Inputs
Kitchen receptacles and appliance circuits are subject to safety requirements that depend on the adopted electrical code and the project conditions. GFCI and AFCI protection, countertop receptacle placement, required small-appliance circuits, dedicated appliance circuits, and permitted island outlet methods should be confirmed by the project electrician and local authority.
For California projects permitted in 2026, the 2025 California Building Standards Code became effective January 1, 2026 and includes the California Electrical Code as Part 3. Local amendments and the permit application date can still affect what applies, so do not copy a circuit plan from an older remodel or an out-of-state article.
6. Build the Lighting Plan in Layers
One grid of recessed lights rarely does every job well. A more useful kitchen combines layers that can operate independently.
Lighting layer | Primary job | Common locations | Planning detail |
Ambient | Comfortable overall brightness | Recessed lights, flush mounts, ceiling fixtures | Aim for even coverage without turning the ceiling into a dense grid |
Task | Illuminate hands and work surfaces | Under cabinets, sink, range, pantry worktop | Position the light between the user and the task to reduce shadows |
Decorative | Add scale and visual focus | Island, peninsula, breakfast area | Size and position fixtures after the island and seating are fixed |
Accent | Add depth or highlight materials | Glass cabinets, shelves, toe kicks, art | Use selectively so it supports the architecture rather than creating clutter |
Night | Provide low-glare navigation | Toe kicks, under counters, selected ceiling lights | Put it on a separate control or sensor where appropriate |
Use Lumens, Distribution, and Glare, Not Watts Alone
Wattage measures energy use, not delivered light. Compare lumens, beam distribution, trim design, mounting height, and surface reflectance. A dark countertop and dark cabinetry absorb more light than pale, reflective finishes.
Choose a Consistent Color Appearance
Correlated color temperature, measured in kelvins, affects whether the room feels warm, neutral, or crisp. Many residential kitchens use warm-to-neutral light, but consistency matters more than following a single number. Pendants, recessed fixtures, and under-cabinet lights with visibly different color temperatures can make cabinetry and countertops appear mismatched.
Prioritize Color Quality
Food, wood tones, paint, and stone look better under light with strong color fidelity. The U.S. Department of Energy’s LED color-quality guidance explains that CRI 90 or higher indicates excellent color fidelity, while also noting that CRI is only one measure of performance.
Check Dimming and Flicker Before Ordering
The lamp or LED driver, fixture, and dimmer must be compatible. Ask for the manufacturer’s dimmer list, expected low-end dimming level, and any required neutral conductor. If possible, mock up the selected fixture and dimmer before purchasing the full quantity.
7. Position Lights From Work Surfaces, Not Room Centerlines
Centering recessed lights in the room can place the user between the light and the countertop, creating a shadow exactly where food is prepared. Lay out ceiling fixtures in relation to countertop edges, cabinet faces, the sink, range, island, and circulation paths.
Under-cabinet lighting should provide a continuous, diffused wash where possible. Locating the source toward the front of the upper cabinet often spreads light across the work surface more effectively than hiding it at the wall. Confirm that the light channel, driver, wire path, and trim are compatible with the cabinet construction.
Decorative fixtures above cabinets should be planned separately from task lighting. If this feature is part of the design, review options for lighting above kitchen cabinets before the crown molding and ceiling details are finalized.
8. Design Switches and Controls Around Daily Routines
A kitchen with five lighting layers does not need a confusing wall of unlabeled switches. Group controls by activity and entry path.
Useful control zones may include:
- general ceiling lighting;
- countertop task lighting;
- island pendants;
- dining or breakfast lighting;
- accent lighting; and
- low-level nighttime lighting.
Place controls at the entrances people actually use, including the route from the garage or family room. Multi-location controls may be appropriate when the kitchen has more than one primary entrance. Use dimmers where changing light levels improves function, and label or program multi-zone controls clearly.
Smart switches can add scenes and scheduling, but they should not make basic lighting dependent on an unreliable app or network. Confirm neutral-wire, hub, load-type, and dimming requirements before rough-in.
9. Coordinate Island Power and Pendant Lighting Together
The island affects the ceiling, floor, cabinets, countertop, and sometimes plumbing. Its electrical decisions should be made from one coordinated drawing.
Before rough-in, confirm:
- the final island footprint and countertop overhang;
- seating positions and knee space;
- sink, dishwasher, microwave, or cooktop locations;
- permitted receptacle type and location;
- floor or ceiling route for wiring;
- pendant centerlines and fixture dimensions; and
- switch or dimmer zone.
Electrical rules for islands and peninsulas have changed across National Electrical Code editions. The NFPA overview of kitchen island receptacle changes explains why familiar side-mounted outlet practices may not match the code edition currently enforced. The local electrician and building department should approve the actual method before cabinets and stone are fabricated.
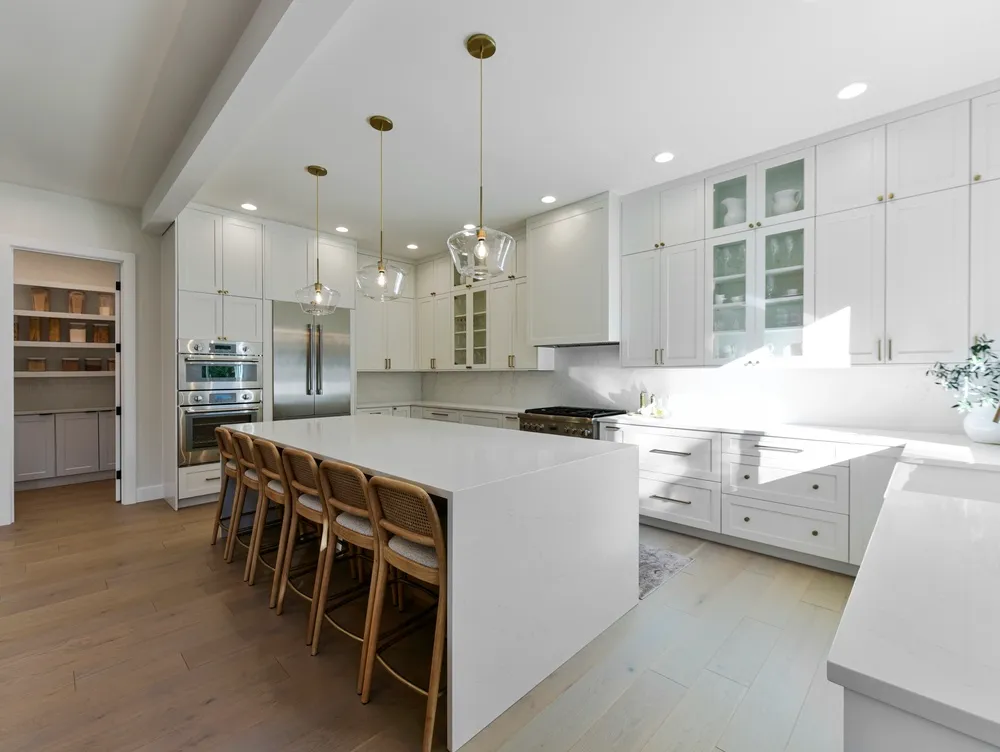
For fixture scale and sightline decisions, use this guide to choosing kitchen island lighting after the island dimensions are locked.
10. Lock Electrical Locations Before Cabinets and Finishes
Electrical boxes, drivers, transformers, and cable routes need to work with the finished cabinetry and surfaces, not merely the open framing.
Cabinets
Check box heights against cabinet rails, drawers, pull-outs, appliance cavities, and finished panels. Identify where under-cabinet drivers will remain accessible for service.
Backsplash
Lay out devices with the tile module, slab veining, grout joints, and decorative focal areas in mind. Electrical safety and accessibility come first, but early coordination can reduce narrow tile cuts and visually random device placement. The remodel plan should connect electrical rough-in with the chosen backsplash installation service.
Countertops
Any listed countertop or work-surface power assembly must be selected before fabrication so the correct opening, support, clearances, and waterproofing details can be documented.
Ventilation
The range hood or downdraft system may affect electrical supply, duct routing, cabinet dimensions, makeup-air considerations, and inspection requirements. Confirm the exact product early.
Permits and Inspections in Mission Viejo
Permit requirements vary by jurisdiction and scope. In Mission Viejo, the city’s current residential kitchen remodel guidance states that a permit is required for projects involving items such as new or altered electrical work, an altered island, or exhaust-hood changes.
The typical sequence is design, permit review where required, demolition, electrical rough-in, rough inspection, insulation or wall closure, cabinet and finish installation, device and fixture trim-out, testing, and final inspection. Review the correct kitchen remodeling sequence so wiring is inspected before it disappears behind drywall, cabinets, tile, or stone.
Common Electrical and Lighting Planning Mistakes
Choosing Fixtures Before the Layout Is Final
Fixture size and quantity should follow the island, work surfaces, and ceiling conditions. Buying pendants first often forces the design to work around the product.
Using One Circuit Assumption for Every Appliance
Model-specific requirements matter. A late appliance substitution can change voltage, breaker, wiring, ventilation, and cabinet needs.
Treating Recessed Lights as Task Lighting Everywhere
Upper cabinets and the person standing at the counter can block ceiling light. Under-cabinet lighting usually provides more direct countertop illumination.
Hiding Drivers Where They Cannot Be Serviced
LED components eventually need access. Do not permanently bury drivers or transformers behind finished surfaces unless the approved system specifically allows it.
Mixing Color Temperatures
Even good fixtures can make a kitchen look disjointed when their light colors differ. Compare all layers together before ordering.
Forgetting Dimmers Until Trim-Out
Not every LED product dims well with every control. Compatibility needs to be checked during specification, not after flicker appears.
Finalizing the Backsplash Before Device Placement
Late outlet decisions can interrupt tile patterns and slab features. Coordinate them before fabrication and installation.
Homeowner Planning Checklist
Bring the following to the design and electrical meeting:
- dimensioned cabinet and appliance plans;
- appliance schedule with model numbers and installation instructions;
- list of countertop appliances used daily and occasionally;
- preferred locations for coffee, baking, charging, and beverage zones;
- lighting inspiration with notes about what you like;
- selected cabinet, countertop, backsplash, and paint samples;
- smart-control or home-automation requirements;
- questions about the panel, service capacity, permits, and inspections; and
- a list of future appliances or features the kitchen may need to support.
Ask the project team to issue a coordinated electrical and reflected ceiling plan. Review it at full scale, then perform a walkthrough after boxes are installed but before walls are closed.
Frequently Asked Questions
When should electrical planning begin in a kitchen remodel?
Begin during design development, after the preliminary layout is established and before cabinets, appliances, countertops, tile, and lighting are ordered. Final electrical locations should be approved before rough-in.
Does a kitchen remodel require a licensed electrician?
New circuits, altered wiring, panel work, and most other kitchen electrical changes should be designed and installed by a properly licensed electrician under the permits and inspections required by the local jurisdiction.
How many lighting layers does a kitchen need?
Most kitchens benefit from ambient and task lighting. Decorative, accent, and nighttime lighting are optional layers that should solve a specific visual or functional need rather than add complexity without purpose.
What color temperature is best for kitchen lighting?
There is no single best value for every kitchen. Warm-to-neutral light is common in residential kitchens. Choose a color appearance that complements the finishes and keep recessed, pendant, and under-cabinet sources visually consistent.
Should kitchen lighting use a CRI of 90 or higher?
CRI 90 or higher is a useful target when accurate food and finish colors matter. CRI does not describe every aspect of color quality, so compare samples and consider other manufacturer performance data as well.
Can outlets be installed on the side of a kitchen island?
The answer depends on the locally adopted electrical code, the receptacle assembly, and the island design. Code provisions have changed, so the electrician and permitting authority should approve the location and product before fabrication.
Should electrical wiring be completed before cabinets are installed?
Electrical rough-in and required rough inspections normally occur before drywall closure and cabinet installation. Devices, fixtures, and final connections are completed later in the project sequence.
Plan the Details Before Construction Starts
A useful kitchen electrical plan starts with the way the room will be used, then coordinates appliances, circuits, outlets, lighting, controls, cabinets, and finishes on the same set of drawings. That preparation prevents guesswork during construction and makes the finished kitchen easier to cook in, clean, and enjoy.
Unique Kitchen & Baths provides complete kitchen remodeling in Orange County from its Mission Viejo base. To coordinate the layout, appliances, lighting, finishes, and construction sequence for your project, schedule a kitchen remodeling consultation.