How to Install Drawer Pulls and Cabinet Knobs Properly
Hardware installation looks simple, but the visible result depends on repeatable measuring, clean drilling, the correct screw length, and restraint when tightening. This guide focuses on the decisions that prevent permanent mistakes, not just the act of putting a screw through a door.
The safest mindset is to treat the first door or drawer as a prototype. Confirm the hardware size, mock up the placement, drill one test location, and inspect it from several feet away before repeating the setup. That short pause protects expensive cabinet fronts and produces a consistent result across the kitchen.
Contents
- 1 Confirm the Hardware and Placement Before You Drill
- 2 Gather Tools That Make the Layout Repeatable
- 3 How to Install Drawer Pulls and Cabinet Knobs Step by Step
- 4 Adapt the Method to Different Cabinet Fronts
- 5 Troubleshoot Problems Without Making Them Worse
- 6 Perform a Professional Quality-Control Check
- 7 Know When Hardware Installation Is Part of a Larger Cabinet Update
- 8 Frequently Asked Questions
- 9 Complete the Cabinet Update With Unique Kitchen and Baths
Confirm the Hardware and Placement Before You Drill
Before beginning how to install drawer pulls and cabinet knobs, confirm what you are installing and where it should sit. Cabinet doors, shallow drawers, deep drawers, and appliance panels do not always share the same visual center. A placement that looks balanced on a slab door can feel crowded on a narrow Shaker rail.
Measure Pulls by Center-to-Center Spacing
Measure a pull from the center of one mounting hole to the center of the other. Do not use the pull’s overall length as the drilling dimension. If you are replacing existing hardware, measure the old hole spacing before ordering.
A pull described as 128 millimeters center-to-center will not fit holes drilled for a 5-inch overall length unless those measurements happen to match.
For replacement projects, take one old pull to the supplier or compare it against a printed sizing guide at full scale. If the new pull uses a different spacing, decide whether a backplate can cover the old holes or whether the cabinet front requires professional filling and refinishing.
The UKB guide on how to update old kitchen cabinets without replacing them can help you evaluate whether hardware is enough or whether the finish also needs attention.
Choose a Consistent Reference Point
On cabinet doors, installers commonly reference the stile and rail instead of measuring from the outer cabinet box. On drawers, the usable visual center may be the drawer front rather than the drawer box behind it. For a bank of equal drawers, a centered pull often looks right. For deep pot drawers, raising the pull slightly can improve reach, but that choice should be mocked up before drilling.
Do not rely on a universal distance from every edge. Door profile, pull projection, hand clearance, and adjacent appliance handles all affect the best position. When cabinet dimensions are still being confirmed, the UKB article on how to measure kitchen cabinets provides a useful foundation for checking door and drawer-front sizes.
Test the Layout With Removable Tape
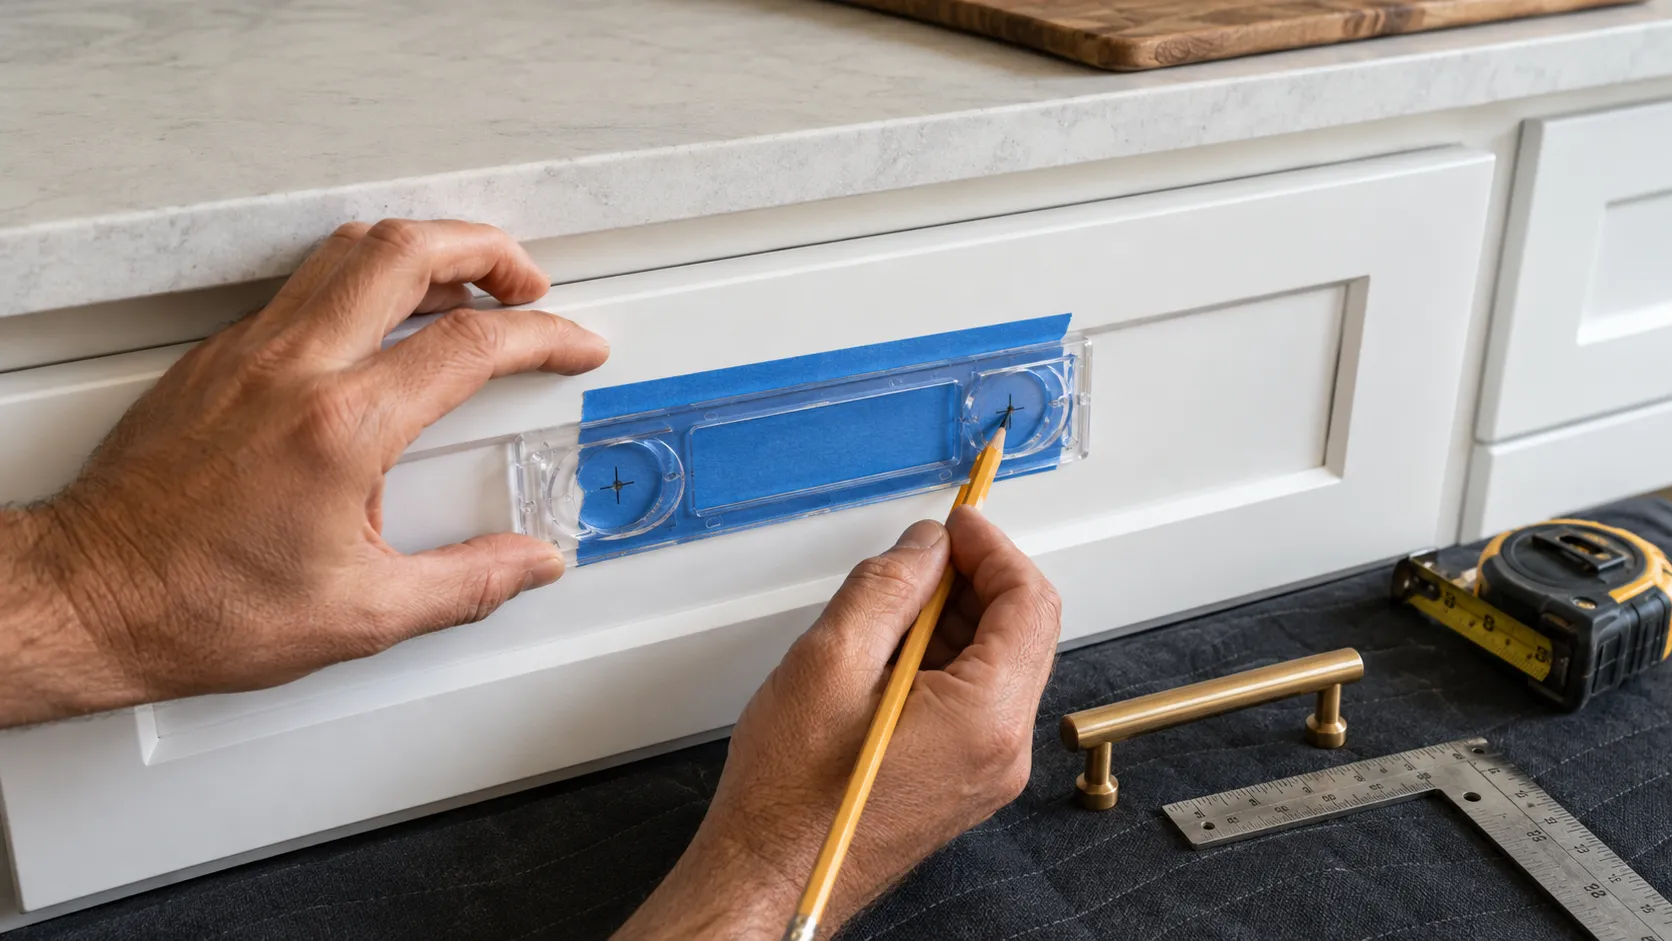
Place low-tack painter’s tape on the cabinet front and draw the proposed centerlines on the tape. Temporarily attach the hardware with removable mounting putty or hold it in place while another person views the elevation from across the room.
Check the first position while standing, seated, and beside an adjacent appliance. This catches a surprising number of placement problems before they become holes.
Finish selection also changes how placement reads. Long black pulls create stronger horizontal and vertical lines than small satin-nickel knobs. If you are comparing finishes, UKB’s white cabinets with black hardware ideas shows how hardware contrast can shape the entire cabinet composition.
Gather Tools That Make the Layout Repeatable
A reliable approach to How to Install Drawer Pulls and Cabinet Knobs uses tools that repeat a confirmed location rather than asking you to remeasure every front. Accuracy comes from a fixed reference edge, a sharp bit, and a stable work surface.
Use a Cabinet Hardware Jig or Shop-Made Template
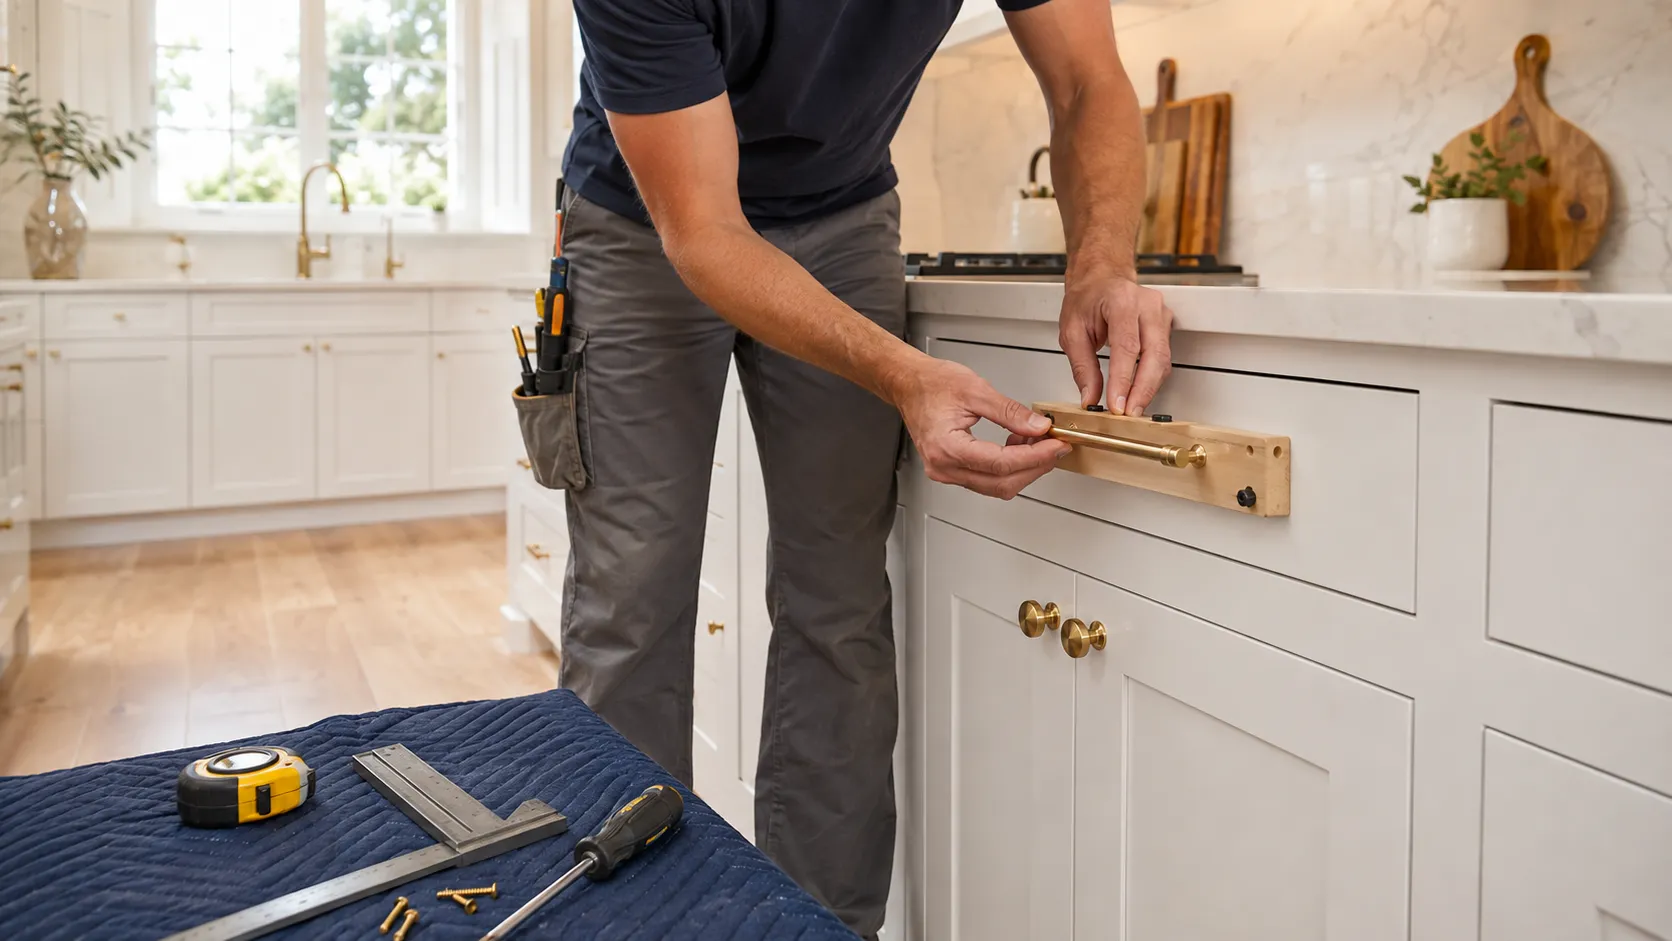
A commercial jig is useful when it registers against the same door or drawer edge each time. Set it using the actual pull, then test the setup on scrap material. The Rockler cabinet hardware installation guide demonstrates why an adjustable jig can reduce spacing errors, especially when the same pull is repeated across multiple fronts.
A simple shop-made template can also work. Use a straight piece of plywood or acrylic, mark the exact reference edges, and drill guide holes only after checking the template against the first cabinet. Label its top, bottom, left, and right sides so it cannot be flipped accidentally halfway through the project.
Select the Correct Drill Bit, Backer, and Fasteners
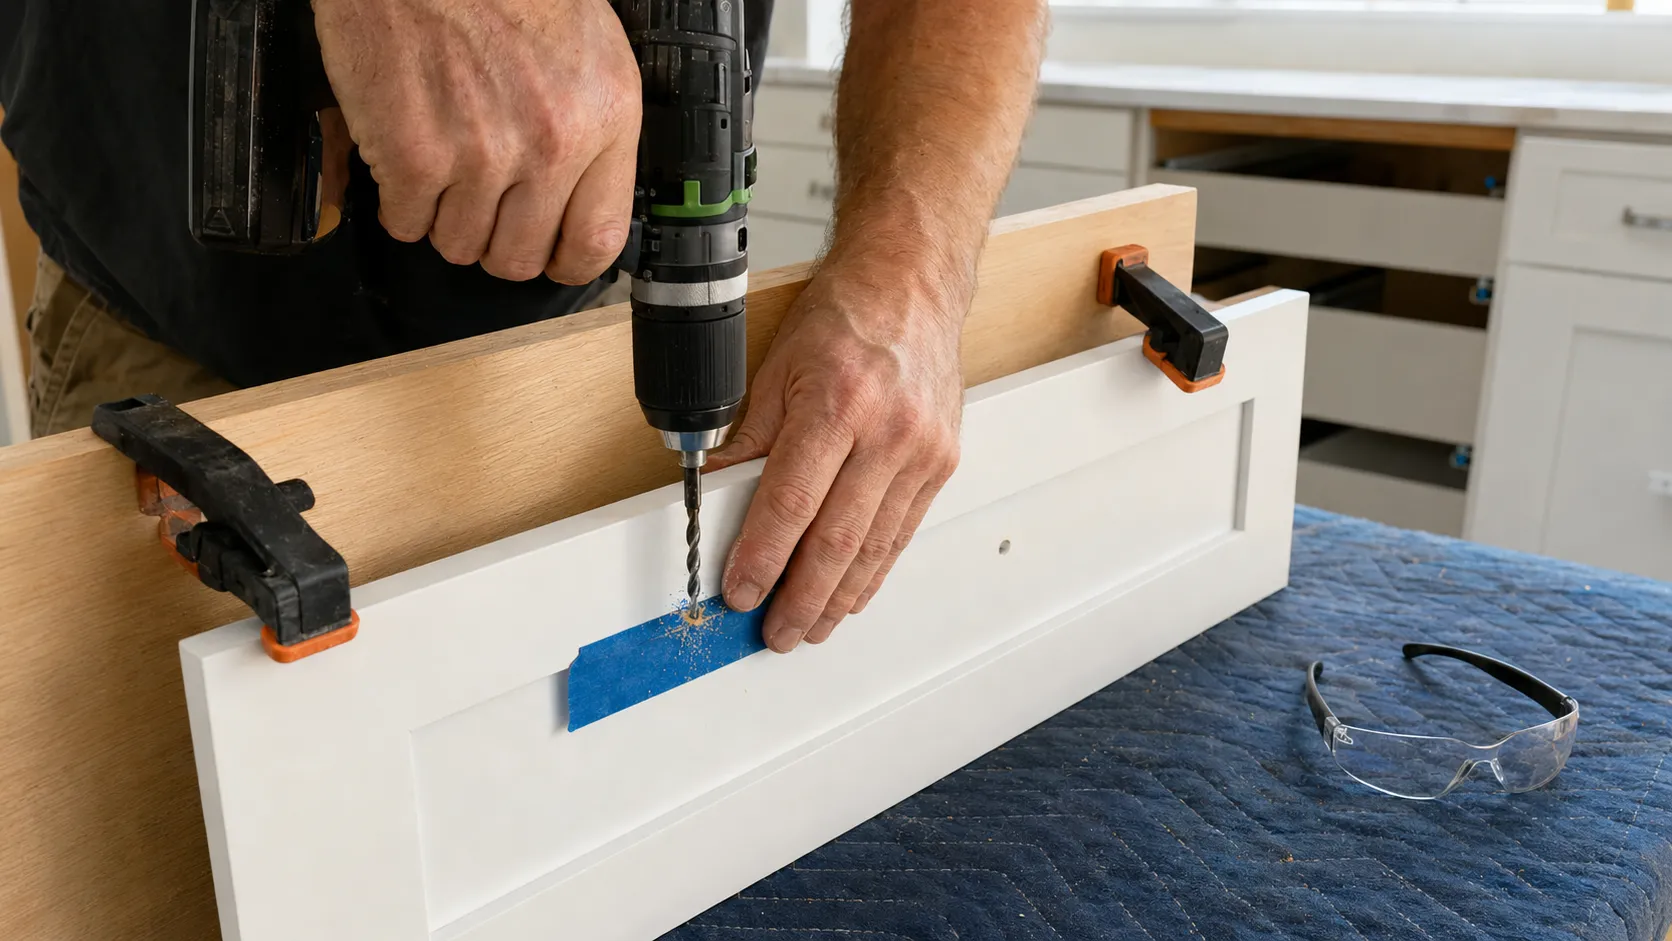
Match the drill bit to the screw shank or the hardware manufacturer’s instructions. A bit that is too large lets the pull shift; a bit that is too small can split the surface or make the screw bind. Clamp a scrap-wood backer behind the drilling point whenever access permits. The backer supports the exit side and reduces tear-out.
Check screw length against the full material stack, including the decorative drawer front and the drawer box. Many cabinet pulls use common 8-32 machine screws, but thread depth and required length vary. Keep shorter and longer screws on hand, and use breakaway screws only when the hardware maker permits them.
Protect the Finish and Control the Drill
Use clean painter’s tape at the drilling location, a sharp bit, moderate speed, and light pressure. Hold the drill perpendicular to the cabinet face. A cordless drill is usually easier to control than an impact driver, which can over-tighten hardware or damage the finish. Place a folded towel below the work area so a dropped pull does not chip a countertop or floor.
How to Install Drawer Pulls and Cabinet Knobs Step by Step
The working sequence for How to Install Drawer Pulls and Cabinet Knobs should move from one verified sample to controlled repetition. Do not mark an entire kitchen until the first installed piece has passed the visual and functional checks.
Step 1: Remove or Stabilize the Door and Drawer Front
Remove a drawer if the box blocks access to the screw location. A cabinet door can often stay in place if it is fully supported, but removing it may offer better drill control. If you remove doors, label each hinge position with removable tape so the door returns to the same opening and alignment.
Step 2: Establish the Centerlines
Mark the horizontal and vertical reference lines on painter’s tape. For a two-hole pull, verify the center-to-center distance twice. For a knob, confirm that the chosen point provides finger clearance from the counter edge, neighboring door, or appliance. Use a square rather than judging alignment by eye.
Step 3: Test the Jig on Scrap Material
Drill a scrap piece with the same thickness as the cabinet front, then install the hardware using the planned screws. This reveals an incorrect hole spacing, undersized bit, protruding screw, or unstable jig before the cabinet is at risk. A cabinet hardware installation template can be helpful, but its supported center-to-center sizes still need to match your actual pull.
Step 4: Drill From the Finished Face
Clamp the backer behind the hole, hold the drill square, and start from the visible finished face. Let the bit cut without forcing it. If the material is prone to chipping, stop as soon as the pilot point emerges, then complete the hole carefully from the back using the pilot point as the guide. Follow the cabinet manufacturer’s instructions when drilling specialty surfaces.
Step 5: Install and Hand-Tighten the Hardware
Insert the screw from the back and start it by hand. Hold the knob or pull square while tightening with a screwdriver. Stop when the hardware is secure and no longer rotates. Over-tightening can crush a wood fiber surface, crack a brittle finish, strip the hardware threads, or leave a visible indentation.
Step 6: Verify the First Piece Before Repeating
Close the door or drawer and view the hardware from the primary kitchen sightline. Confirm that it feels comfortable to grasp and does not contact the adjacent cabinet, wall, or appliance. Only then should you lock the jig setting and continue to the remaining fronts.
Adapt the Method to Different Cabinet Fronts
Knowing How to Install Drawer Pulls and Cabinet Knobs also means adjusting the method to the cabinet construction. The same jig setting should not be forced onto every door and drawer shape when their profiles or proportions differ.
Shaker, Raised-Panel, and Slab Doors
A Shaker door often looks balanced when hardware relates to the frame rather than the recessed center panel. Avoid drilling close to the inner edge of a narrow stile, where the profile may leave little flat bearing surface behind the pull. Slab doors provide more freedom, but their uninterrupted surface makes even small alignment errors easier to see.
Wide Drawers and Double Pulls
A wide drawer may use one long pull or two matching pulls. If using two, establish the drawer center, then mirror each pull around that line. Do not measure one pull from the left edge and the other from the right without first confirming the drawer front is perfectly symmetrical. A full-width template or stop system reduces cumulative error.
Thin Panels and Built-Up Drawer Fronts
A thin panel may require a washer or a shorter screw so the hardware tightens without bottoming out. A built-up drawer front may require a longer screw through both the drawer box and decorative front. Never force a screw that feels too long. It can bottom inside the pull and falsely feel tight while the hardware remains loose.
Troubleshoot Problems Without Making Them Worse
A careful How to Install Drawer Pulls and Cabinet Knobs project includes a recovery plan. Stop at the first sign of misalignment, chipping, or poor thread engagement instead of repeating the problem across the room.
The Pull Looks Crooked
First check whether the pull itself is twisted or whether the door is out of alignment. Loosen both screws slightly, square the pull, and retighten evenly. If the drilled holes are too tight to allow adjustment, do not enlarge them aggressively. A cabinet professional can judge whether minimal correction, a backplate, or surface repair is safest.
The Screw Is Too Short or Too Long
Measure the total panel thickness and the usable thread depth inside the hardware. Replace the screw with the correct length rather than stacking several loose washers as a permanent fix. If a breakaway screw is approved, cut it at the intended segment and clean the threads before installation.
The Exit Side Chipped
Preserve any loose finish fragment and avoid sanding the visible face. Small damage on the concealed side may be stabilized, but visible chips often need finish-specific repair. The best prevention remains a sharp bit, a backer block, controlled pressure, and a test hole in comparable scrap.
Perform a Professional Quality-Control Check
The final stage of How to Install Drawer Pulls and Cabinet Knobs is not simply confirming that every screw is tight. A professional check looks at alignment, hand comfort, hardware clearance, and the cabinet finish under normal kitchen lighting.
Check Long Sightlines
Stand at the kitchen entry and look across each row of pulls. Then crouch slightly and check the horizontal line from counter height. A single pull that is only slightly high may be more obvious from across the room than it was during installation.
Test Daily Use
Open every door and drawer fully. Make sure fingers do not scrape neighboring fronts, long pulls do not collide at inside corners, and cabinet doors do not strike refrigerator or wall hardware. Recheck drawer fronts after several openings because a loose screw may reveal itself only under use.
Record the Hardware Specification
Save the product name, finish, center-to-center spacing, screw size, and one spare pull. A photo of the final jig setting can also help if a damaged front or pull is replaced later. This small record prevents future guesswork.
Know When Hardware Installation Is Part of a Larger Cabinet Update
Sometimes How to Install Drawer Pulls and Cabinet Knobs is only the finishing step. If doors are peeling, hinges are failing, drawer fronts are uneven, or old holes conflict with the new layout, addressing the cabinet system first produces a better and longer-lasting result.
Coordinate Hardware With Refacing and Finishing
Choose the final hardware before doors are refinished or refaced so old holes can be repaired correctly and new holes can be planned around the final profile. Hardware samples should be viewed beside the countertop, backsplash, faucet, and appliance finishes under the kitchen’s actual lighting.
Call a Professional When the Material or Layout Raises the Risk
Professional help is sensible for high-gloss fronts, brittle laminate, glass inserts, expensive custom doors, oversized appliance pulls, or a full kitchen with multiple cabinet styles. It is also appropriate when old holes need invisible repair. The cost of correcting one damaged custom front can exceed the cost of careful installation.
Frequently Asked Questions
These concise answers address common decisions that arise during How to Install Drawer Pulls and Cabinet Knobs.

UKB
Unique Kitchen & baths is a family-owned business that is committed to providing high-quality kitchen and bathroom remodeling, as well as flooring installations at affordable prices.