12 Practical Kitchen Island Back Panel Ideas in 2027
Kitchen island back panel ideas should be chosen for the way the exposed side is actually used. A panel facing counter stools needs to resist shoes, spills and frequent cleaning. One facing a living room may need to look more like furniture. A panel beside a traffic path should avoid sharp projections, while a non-seating side may be the right place for shallow storage.
The best design is not automatically the most decorative. It is the finish that works with the island’s structure, clearances, electrical plan, countertop and daily maintenance. Painted trim, natural wood, fluted panels, tile and slab materials can all work, but they require different backing, edge details and installation methods.
This guide compares 12 practical options and explains what to resolve before materials are ordered.
Contents
- 1 First, identify what the back panel needs to do
- 2 Kitchen island back panel materials compared
- 3 1. Painted flat panel for a clean, affordable update
- 4 2. Applied molding for a furniture-style island
- 5 3. Beadboard or tongue-and-groove paneling
- 6 4. Natural wood veneer or finished plywood
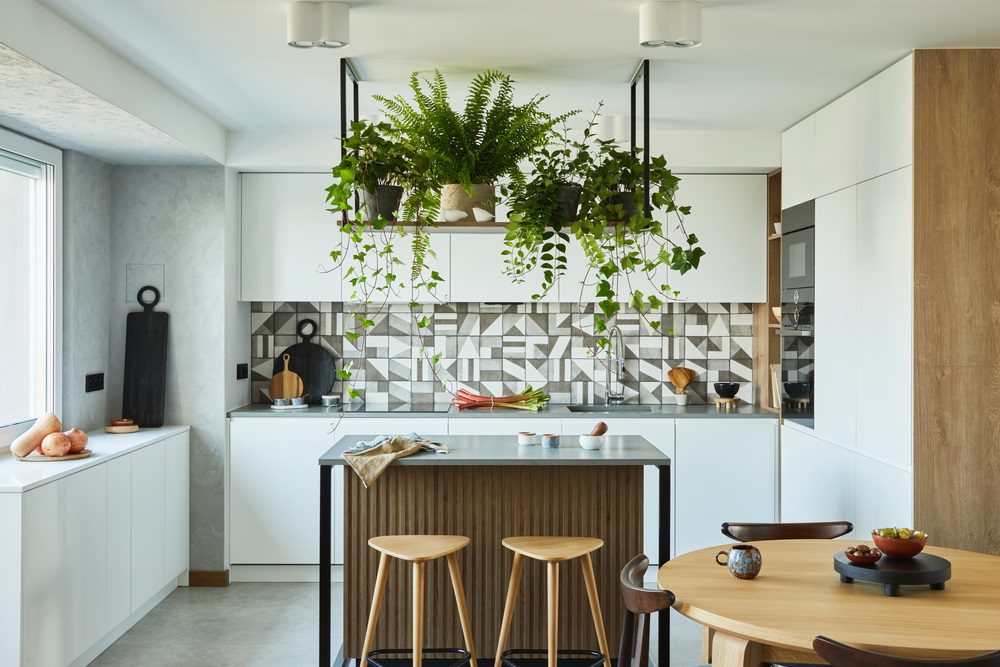
- 7 5. Fluted, reeded or slatted wood panels
- 8 6. Ceramic or porcelain tile
- 9 7. Full-height stone, quartz or sintered slab
- 10 8. Waterfall ends with a quieter center panel
- 11 9. Metal panels used as a controlled accent
- 12 10. Back-painted glass or mirrored panels
- 13 11. Hidden storage behind flush doors
- 14 12. Open shelves, bookcases or display niches
- 15 Match the back panel to the island’s daily use
- 16 Protect seating comfort and circulation
- 17 Coordinate outlets and access before covering the panel
- 18 Confirm structure, anchoring and countertop support
- 19 Install the back panel at the right stage
- 20 Budget intelligently without making the panel look unfinished
- 21 Common kitchen island back-panel mistakes
- 22 Frequently asked questions
- 22.1 What is the most durable kitchen island back panel?
- 22.2 What is the easiest island back panel to clean?
- 22.3 Can I tile directly over an existing island panel?
- 22.4 Can I add storage to the seating side of an island?
- 22.5 Are wood slats practical behind counter stools?
- 22.6 Should the back panel match the kitchen cabinets?
- 22.7 Can I cover an island outlet with a decorative panel?
- 22.8 How can I update an island back panel on a limited budget?
- 23 Design the back panel as part of the whole island
First, identify what the back panel needs to do
“Back panel” usually means the finished side of the island that faces seating or an adjoining room. It may be a decorative skin applied over the island structure, a framed panel that matches the cabinet doors, or part of a deeper storage system. It should not be confused with a removable structural panel, appliance access panel or unfinished cabinet back.
Start with four questions:
- Will people sit there? Protect knee and foot space before adding thickness or projecting trim.
- Will the surface be touched or kicked? Choose a finish that can be cleaned and repaired.
- Does the island contain power, plumbing or appliances? Coordinate access and code requirements before covering the surface.
- Should the island blend in or become a focal point? Match the cabinetry for a quiet look or introduce texture and color for emphasis.
The panel cannot compensate for an island that is too large for its room. Confirm comfortable space around a kitchen island before selecting any decorative treatment that increases depth.
Kitchen island back panel materials compared
Back-panel option | Relative cost | Cleaning | Visual effect | Retrofit difficulty | Best use |
Painted flat panel | $ | Easy when the coating is washable | Quiet and minimal | Low | Budget updates and modern kitchens |
Applied molding or Shaker panels | $$ | Easy to moderate | Furniture-like and tailored | Low to moderate | Transitional and traditional kitchens |
Beadboard or tongue-and-groove | $$ | Moderate because grooves collect residue | Cottage, coastal or casual | Moderate | Seating sides and warm painted palettes |
Wood veneer or finished plywood | $$ to $$$ | Easy with a suitable sealed finish | Warm and architectural | Moderate | Modern and organic interiors |
Fluted, reeded or slatted wood | $$$ | More demanding because of grooves | Textural and contemporary | Moderate to high | Low-splash focal sides |
Ceramic or porcelain tile | $$ to $$$ | Tile is easy; grout needs more care | Patterned, graphic or handcrafted | High | Durable statement panels |
Stone or sintered slab | $$$$ | Usually easy with material-specific care | Seam-light and substantial | High | Premium focal islands |
Metal panel | $$$ | Varies by finish; fingerprints may show | Industrial or tailored | Moderate to high | Accent panels away from heavy kicking |
Mirrored or back-painted glass | $$$ | Shows smears and impacts | Reflective and polished | High | Carefully detailed adult households |
Hidden cabinets | $$$ to $$$$ | Similar to cabinetry | Clean and highly functional | High | Non-seating sides with enough aisle space |
Open shelves or niches | $$$ | Requires dusting and editing | Furniture-like display | High | Island ends or non-seating elevations |
Removable decorative skin | $ to $$ | Depends on material | Flexible and updateable | Low to moderate | Rentals, staged updates or future changes |
Dollar signs indicate relative project complexity, not quoted pricing. Substrate repair, electrical relocation, corner finishing and custom fabrication can change the cost significantly.
1. Painted flat panel for a clean, affordable update
A smooth painted panel is the simplest route when the island shape is already right. Match the base cabinetry for a continuous look or use a contrasting color to make the island a focal point.
The panel still needs proper preparation. Existing glossy finishes, grease, dents and exposed fasteners can show through a new coat. If the island receives frequent contact from shoes or stools, use a cabinet-appropriate coating system and keep labeled touch-up material.
Paint is also one of the easiest options to change later. It works well when the countertop and flooring already carry enough pattern.
2. Applied molding for a furniture-style island
Applied rails, stiles or picture-frame molding can make a plain island back look connected to Shaker or inset cabinetry. The panel proportions should align with nearby doors, drawers, stool positions and countertop supports.
Avoid creating many narrow boxes simply to fill the surface. Fewer, well-proportioned panels usually look more intentional. At inside corners, confirm that the added trim will not interfere with end panels, doors or decorative legs.
For a modern interpretation, use shallow square-edge molding painted the same color as the island. For a more traditional result, coordinate the profile with the cabinetry rather than adding an unrelated ornamental shape.
3. Beadboard or tongue-and-groove paneling
Vertical boards can add rhythm and make a wide island elevation feel taller. Horizontal boards visually extend the island, but their seams can collect residue and may emphasize uneven floors or counters.
Painted beadboard suits farmhouse, cottage and transitional kitchens. A clear-finished tongue-and-groove panel adds natural warmth. In either case, detail the bottom edge so mopping water cannot repeatedly soak an unfinished cut edge.
Use a durable, cleanable finish on seating sides. Deep grooves look attractive in photographs but take longer to wipe after spills or muddy shoes.
4. Natural wood veneer or finished plywood
A vertical-grain wood panel can warm white, gray, black or painted cabinetry without turning the island into a rustic feature. White oak creates a lighter effect, while walnut adds deeper contrast.
Ask the fabricator to plan grain direction, veneer matching, corner seams and the transition to side panels. A random grain break at an outside corner can make an otherwise premium treatment look patched together.
Wood movement and edge protection matter. The installer should use a construction and finish system appropriate for the chosen material and indoor conditions. Do not rely on an unfinished decorative sheet near a sink, dishwasher or floor-cleaning zone.
5. Fluted, reeded or slatted wood panels
Ribbed profiles create shadow and depth, especially on an island visible from a living or dining area. They are most successful when the profile terminates cleanly at corners and does not fight with door grooves, flooring lines or a heavily patterned countertop.
Practical limits include dust in the grooves, difficult touch-ups and uncomfortable contact at knee level. Rounded reeds are usually friendlier on seating sides than sharp-edged slats. If stools will slide against the panel, test a full-size sample at the actual seat height.
Prefinished modular panels can simplify installation, but seams and end caps need to be shown on the elevation before ordering.
6. Ceramic or porcelain tile
Tile can turn the island into a strong visual feature and offers many colors, textures and patterns. The design should account for grout color, joint size, edge trim, corner cuts, outlet covers and alignment with the countertop.
The Tile Council of North America explains in its tile installation handbook overview that tile methods require a properly designed, constructed and prepared substructure. That matters on an island because a flexible or poorly prepared cabinet skin is not automatically a suitable tile substrate.
Porcelain is often practical in high-contact areas, but textured tile and light grout can require more cleaning. Use the exact tile sample to test wipeability. Plan the exposed edges with a finished tile edge, trim profile or coordinated return rather than leaving raw cuts visible.
7. Full-height stone, quartz or sintered slab
A slab back panel can repeat the countertop or use a contrasting material. It creates fewer joints than tile and can make the island read as one sculpted object.
This is a fabrication decision, not a simple decorative overlay. Material weight, panel thickness, support, seam placement, transport and attachment must be coordinated with the cabinet and countertop teams. Outlet and access-panel cutouts need to be located before fabrication.
If the countertop already has dramatic movement, consider whether carrying it down another large surface will improve continuity or make the island too dominant. A quiet slab on the back can be more versatile than repeating a strong pattern on every plane.
8. Waterfall ends with a quieter center panel
Waterfall countertop ends can frame a painted, wood or paneled back without covering the entire elevation in stone. This combination gives the island a strong outline while controlling cost and visual weight.
Resolve the junction where the center panel meets the waterfall ends. Inconsistent reveals, thick caulk lines or unmatched edge depths are noticeable on a long island. If seating is present, the countertop support and overhang must be designed before the waterfalls and center panel are fabricated.
9. Metal panels used as a controlled accent
Stainless steel, blackened steel, brass-toned sheet and other metal finishes can suit contemporary or industrial kitchens. The success depends on the finish, gauge, backing and edge treatment.
Polished metal shows fingerprints and distortions. Very thin sheet can telegraph an uneven substrate. Some finishes scratch, oxidize or react to cleaning products, so obtain a care sheet and physical sample before ordering.
Metal is often stronger as a framed center panel or limited accent than as an unbroken surface behind active family seating.
10. Back-painted glass or mirrored panels
Glass creates a smooth, reflective surface and can introduce color without visible brush texture. Mirrors may bounce light or views, but they also reflect clutter, stool backs and people moving through the room. That reflection should be tested from the dining and living areas, not judged from a close-up sample.
Use safety-appropriate glazing and professional fabrication. Edge protection, adhesive compatibility, outlet cutouts and replacement access need to be resolved before installation. This is not the most forgiving option for homes where stools frequently strike the island.
11. Hidden storage behind flush doors
Push-latch doors can turn a non-seating island back into shallow storage for serving pieces, board games or infrequently used kitchen items. The doors should remain accessible without blocking the main walkway when open.
Storage depth comes from somewhere. It may reduce the depth available for working-side cabinets, knee space or circulation. Show the storage in plan and section drawings before assuming it is “free” capacity.
Hidden storage works best on a back or end elevation without stools. If seating and storage share one side, the design may become uncomfortable and awkward to use.
For broader storage and styling options, review these kitchen island ideas for small kitchens.
12. Open shelves, bookcases or display niches
An open niche at an island end can hold cookbooks or a few useful objects without interfering with seating. A full bookcase along the back requires more space and a realistic plan for dust, visual clutter and stool placement.
Avoid open wine storage near heat, strong light or an appliance that warms the cavity. Decorative niches also need finished interior edges, adequate shelf thickness and safe corner details in a busy circulation path.
Use open storage where the objects serve the room. A niche designed only for staged decor can become an inconvenient dust collector.
Match the back panel to the island’s daily use
The same material can perform well in one home and poorly in another.
Household or island condition | Better choices | Use cautiously | Why |
Young children and daily counter seating | Painted panel, applied molding, sealed wood, smooth porcelain tile | Mirrors, sharp slats, delicate metal | Surfaces need to tolerate shoes, spills and frequent wiping |
Sink or dishwasher in the island | Sealed painted panel, porcelain, suitable slab material | Unfinished wood, water-sensitive edge details | Moisture and cleaning occur more often around the base and edges |
Cooktop in the island | Smooth, cleanable materials approved for the location | Deep grooves, combustible trim near restricted zones | Appliance clearances, ventilation and manufacturer instructions take priority |
Island faces a formal living area | Veneer, framed panels, quiet slab, controlled fluting | Busy tile combined with dramatic stone | The elevation reads like furniture from the adjoining room |
Narrow circulation path | Flat or shallow-relief finish | Shelves, deep molding, projecting ledges | Projections reduce usable clearance and create impact points |
Future style flexibility | Painted panel, removable skin, restrained molding | Highly specific mosaics or integrated specialty materials | Simpler treatments are easier to refinish or replace |
Protect seating comfort and circulation
A beautiful back panel is a poor trade if people cannot sit comfortably. Applied material, trim, shelves and doors can reduce usable knee depth. Decorative legs or corbels can also limit stool placement.
Before finalizing the panel:
- draw each stool at the planned width;
- confirm clear knee and foot space;
- check whether trim lands behind a knee or stool leg;
- open nearby storage doors in the drawing;
- measure the aisle with stools both tucked in and occupied;
- check countertop support requirements.
Use this guide to planning a kitchen island with seating before adding depth or storage to the back. In a compact room, compare the entire arrangement with a 10-by-10 kitchen layout with an island to understand how quickly an oversized feature can restrict movement.
Coordinate outlets and access before covering the panel
An island panel may contain receptacles, switches, charging devices or access to electrical connections. Do not tile, glue or fasten decorative material over an electrical box, required access point or cable path.
Rules for island and peninsula receptacles have changed across National Electrical Code editions. NFPA’s overview of kitchen island and peninsula outlets under the NEC shows why the electrical design should be based on the locally adopted code, not an old photograph or generic online rule. A licensed electrician and the local authority having jurisdiction should confirm the final plan.
Resolve box depth, cover-plate size and finish before ordering tile, glass, metal or slab panels. A standard white plate placed at the center of a premium patterned panel can undermine the entire design. It may be possible to locate devices on an island end or coordinate a matching cover, but safety, accessibility and code compliance come first.
Plan the circuits and device locations with this kitchen electrical and lighting change guide.
Confirm structure, anchoring and countertop support
Decorative panels do not anchor an island. The cabinet assembly and any required blocking must be secured appropriately to the floor or approved support before heavy finishes are added. Review the practical steps for securing a kitchen island to the floor with the project contractor.
Additional material weight can matter, especially with slab stone, thick tile assemblies and masonry-look products. The cabinet, substructure, floor and attachment system should be evaluated as one assembly. If the island contains a long seating overhang, the support design should be resolved independently from the decorative back panel.
The National Kitchen & Bath Association’s planning guidelines cover cabinetry, functional storage, seating, electrical planning, lighting and systems coordination. This is the right level of integration for an island that combines structure, services, seating and finish materials.
Install the back panel at the right stage
The exact sequence depends on the material, but design decisions should be finalized early.
- Confirm the island size, location, working clearances and seating.
- Coordinate cabinets, appliances, plumbing, electrical boxes and cable paths.
- Resolve floor anchoring, countertop support and decorative blocking.
- Verify the panel substrate and manufacturer-approved installation method.
- Template any slab, glass or metal components after the supporting work is stable.
- Install the finish while keeping required access points usable.
- Seal or finish exposed edges according to the material system.
- Complete final electrical trim and inspect the work.
For coordination with the rest of the project, follow a logical kitchen remodeling order of operations rather than treating the panel as an isolated last-minute addition.
Budget intelligently without making the panel look unfinished
A strong result does not require the most expensive material. Put the budget into visible alignment, clean corners and durable edges.
Lower-cost approaches
- repair and repaint a smooth panel;
- add simple applied molding;
- use paint-grade beadboard;
- introduce one contrast color;
- install a removable prefinished panel where appropriate.
Mid-range approaches
- use finished plywood or real-wood veneer;
- add restrained fluted panels;
- install ceramic or porcelain tile;
- build one useful niche at an island end.
Higher-cost approaches
- fabricate a stone, quartz or sintered slab panel;
- integrate waterfall ends;
- add custom hidden storage;
- use specialty metal or glass with coordinated cutouts.
Ask for a scope that identifies substrate preparation, trim pieces, corner returns, electrical cutouts, finish work and protection. A low material allowance can still produce a high labor bill when the design includes many small cuts or complex edges.
For broader budgeting, review custom kitchen island costs in Mission Viejo.
Common kitchen island back-panel mistakes
- Adding shelves behind stools: storage becomes difficult to reach and removes knee space.
- Choosing from a close-up sample only: pattern scale and reflection change across a long elevation.
- Ignoring the bottom edge: shoes, vacuum cleaners and mopping water damage vulnerable edges first.
- Using tile over an unsuitable skin: grout and tile can crack when the substrate flexes.
- Installing heavy material without evaluation: decorative stone and thick assemblies need proper support.
- Covering electrical access: outlets, boxes and service points must remain safely coordinated and accessible.
- Forgetting the living-room view: mirrors and glossy surfaces may reflect clutter rather than light.
- Mixing too many textures: a dramatic counter, patterned panel, bold floor and decorative pendants compete.
- Treating seating clearance as leftover space: people, stools and circulation need to be drawn before construction.
- Skipping edge details: raw tile, exposed plywood and unresolved metal edges make the work look incomplete.
After the construction decisions are settled, use these kitchen island decor ideas for styling the countertop without obscuring the panel design.
Frequently asked questions
What is the most durable kitchen island back panel?
Durability depends on the complete assembly. Smooth porcelain tile over an appropriate substrate, a suitable slab material, properly finished wood and quality cabinet-grade paint can all perform well. Edges, joints, backing and installation quality matter as much as the visible surface.
What is the easiest island back panel to clean?
Smooth, low-joint surfaces are generally easiest to wipe. Painted panels, suitable slab materials, back-painted glass and large-format tile reduce grooves and grout lines. Always follow the material or coating manufacturer’s care instructions.
Can I tile directly over an existing island panel?
Not automatically. The existing surface must be rigid, properly prepared and compatible with the selected tile installation system. A tile professional should confirm the substrate, adhesive, movement accommodation, edges and added thickness.
Can I add storage to the seating side of an island?
Yes, but storage depth reduces knee space or working-side cabinet depth. Doors also need room to open. Storage is usually more practical on an island end or a non-seating elevation.
Are wood slats practical behind counter stools?
They can be, but rounded or shallow profiles are more comfortable than sharp slats. Grooves collect dust, and stool contact can damage projecting edges. Test a full-size sample at knee and foot height.
Should the back panel match the kitchen cabinets?
It can match for a quiet, built-in appearance or contrast to create a focal point. Keep at least one relationship to the room through color, wood tone, door profile, hardware or countertop so the island does not look unrelated.
Can I cover an island outlet with a decorative panel?
No. Do not cover an outlet, electrical box or required access point. Coordinate device placement and box depth with a licensed electrician under the locally adopted code before the decorative panel is fabricated or installed.
How can I update an island back panel on a limited budget?
Repair and paint the existing surface, add simple applied molding or use a suitable prefinished removable panel. Budget for preparation, corners, base edges and outlet trim because those details determine whether the update looks finished.
Design the back panel as part of the whole island
The most successful kitchen island back panel ideas balance appearance with seating, clearances, cleaning, structure and electrical access. Begin with the island plan and daily use, then select a material whose thickness, maintenance and installation requirements fit the project.
Browse the Unique Kitchen & Baths kitchen gallery to compare complete island compositions.