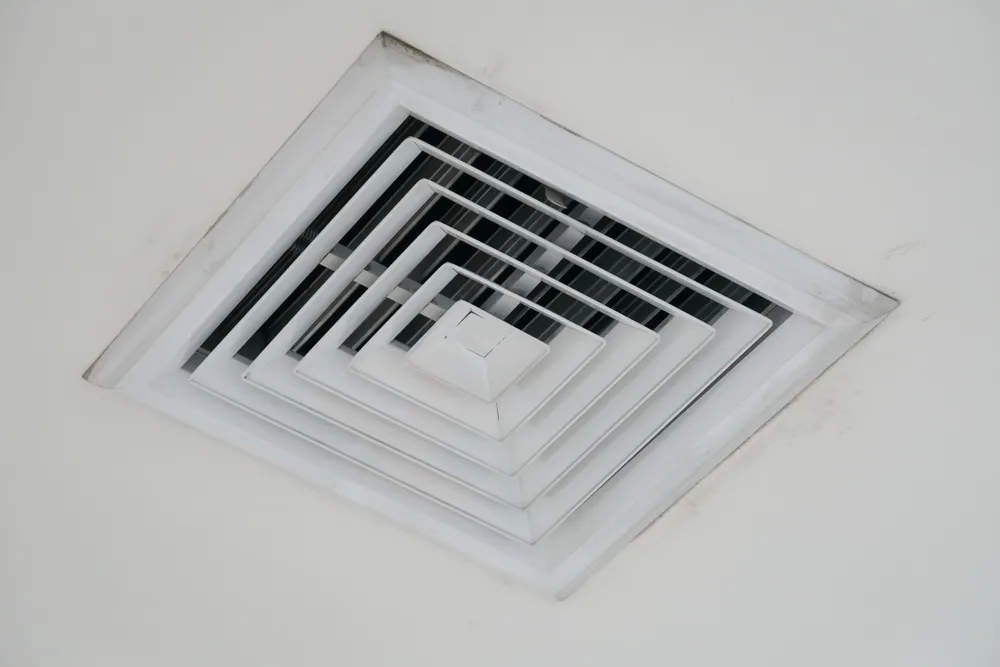
How to Repair Bathroom Exhaust Fan | A Beginner’s Guide
A bathroom exhaust fan can be noisy, weak, completely silent, or dripping water for very different reasons. Dust may be slowing the blower. A loose grille may be rattling. The motor may be worn out. The duct may be crushed, disconnected, or blocked at the exterior damper. A fan that will not start could also have a switch, circuit, or wiring fault.
The safest way to repair a bathroom exhaust fan is to diagnose the symptom first, shut off the circuit before opening the grille, clean only accessible parts, and stop when the work reaches wiring or concealed ductwork. This guide shows you what a homeowner can reasonably check and when the problem belongs to an electrician, ventilation technician, or remodeling contractor.
If the fan issue is part of a larger project involving lighting, ceiling repair, a shower, or the bathroom layout, review professional bathroom remodeling services in Orange County before treating each system as a separate job.
Safety first: Turn off the fan circuit at the electrical panel before removing the grille or touching the housing. Confirm that the fan and any integrated light do not operate from their wall controls. Stop if the breaker will not remain set, the unit smells burned, insulation appears melted, wiring is loose or exposed, or there is evidence of overheating. Do not rely on the wall switch alone to isolate power.
Contents
- 1 Diagnose the Symptom Before Taking the Fan Apart
- 2 What You Can Safely Repair Yourself
- 3 Why a Clean Fan Can Still Have Weak Airflow
- 4 Is the Fan Properly Sized?
- 5 Repair the Motor or Replace the Entire Fan?
- 6 When to Call an Electrician or Remodeling Contractor
- 7 Bathroom Fan Permits in Mission Viejo
- 8 Prevent the Same Problem From Returning
- 9 Frequently Asked Questions
- 9.1 Why is my bathroom exhaust fan running but not removing steam?
- 9.2 Can I replace only the bathroom fan motor?
- 9.3 Why does water drip from my bathroom fan?
- 9.4 How often should a bathroom exhaust fan be cleaned?
- 9.5 How long should the bathroom fan run after a shower?
- 9.6 Do I need a permit to replace a bathroom exhaust fan in Mission Viejo?
- 9.7 Is a loud bathroom fan dangerous?
- 10 Get Help With a Fan Problem That Is Bigger Than the Fan
Diagnose the Symptom Before Taking the Fan Apart
The sound and behavior of the fan usually provide the first useful clue. The table below helps narrow the problem without assuming the motor has failed.
Symptom | Common causes | Safe first check | When to stop and call a professional |
Fan runs but airflow feels weak | Dusty blower, blocked exterior damper, crushed duct, excessive bends, disconnected duct, insufficient makeup air, undersized fan | Clean the grille and accessible blower, then check whether the exterior damper opens while the reassembled fan runs | Duct is inaccessible, disconnected, wet, improperly terminated, or needs resizing |
Rattling or vibrating | Loose grille, spring clip, fastener, blower wheel, motor plate, or housing | With power off, check the grille clips and visible mounting points without disturbing wiring | Housing moves in the ceiling, blower is damaged, or vibration continues after cleaning |
Grinding or squealing | Worn motor bearings, rubbing blower wheel, failing motor assembly | With power off, check for visible debris and whether the blower is damaged or out of position | Motor replacement is not explicitly supported for the model or the unit shows heat damage |
Fan hums but does not spin | Obstructed blower or failed motor | Turn off power immediately and look for a visible obstruction after the unit cools | The blower is clear but the motor still will not start |
Fan is completely dead | Tripped breaker or GFCI, failed switch, loose connection, failed motor, control or sensor problem | Check the electrical panel and accessible GFCI devices without opening wiring compartments | Breaker trips again, power is present but the fan is dead, or electrical testing is required |
Water drips from the grille | Condensation in a cold or poorly insulated duct, sagging duct, roof or wall-cap leak, exterior air entering the duct | Note when dripping occurs: after showers, during cold weather, or during rain | Water reaches electrical parts, ceiling staining grows, or attic and exterior inspection are needed |
Fan works but mirrors stay fogged | Fan too small, poor duct performance, closed exterior damper, long run, air cannot enter under the door, fan turned off too soon | Check run time, grille cleanliness, door undercut, and exterior damper movement | Moisture persists despite normal operation or mold and finish damage are present |
A sheet of tissue held near the grille can show whether air is moving, but it does not measure airflow. A fan may hold tissue while delivering much less than its rated cubic feet per minute (CFM). Installed performance depends on the duct, elbows, termination, and pressure resistance.
What You Can Safely Repair Yourself
For many homeowners, “repair” should mean cleaning, reseating a grille, checking visible fasteners, confirming exterior damper movement, and identifying the model for a compatible part. It should not mean opening electrical junctions or improvising a motor that does not match the housing.
Tools for Basic Cleaning and Inspection
- Stable step ladder rated for the user
- Safety glasses and dust mask
- Flashlight
- Vacuum with a soft brush attachment
- Soft cloth and mild detergent
- Screwdriver only if the manufacturer’s instructions require one for the grille or motor plate
- Phone camera for the model label and existing assembly
Step 1: Record the Symptom
Run the fan before shutting off power. Note whether the problem is noise, weak airflow, delayed starting, cycling, dripping, or no operation. If the unit has a light, heater, timer, occupancy sensor, or humidity control, record which function fails.
This prevents a common mistake: cleaning the grille and assuming the problem is solved when the exterior damper or control is still at fault.
Step 2: Turn Off the Circuit
Switch off the breaker that supplies the fan. Try the wall controls and confirm that the fan and integrated light do not operate. The Home Ventilating Institute’s maintenance guidance also starts with disconnecting power at the breaker and confirming the wall switch no longer operates the unit.
If you cannot identify the correct circuit, stop. Do not remove the grille while guessing which breaker supplies the fan.
Step 3: Remove and Clean the Grille
Many grilles pull down and release from two spring clips, but designs vary. Follow the manufacturer’s instructions for the model. Support the grille so it does not fall, and disconnect any grille-mounted light only as the manual directs.
Vacuum loose dust first. Wash a removable plastic grille with mild detergent only if the manufacturer allows it. Dry it fully before reinstalling it. Never allow water into the motor, lamp holder, sensor, or electrical connections.
Step 4: Vacuum Accessible Dust From the Housing
Use a soft brush attachment to remove dust from the blower wheel, motor exterior, and housing. Do not bend the blower blades, pull wires, spray cleaner into the unit, or flood the housing with a wet cloth.
Dust buildup can unbalance the blower and restrict airflow. Manufacturer guidance from Broan-NuTone’s bathroom fan troubleshooting resource identifies dust, loose components, worn bearings, an aging motor, and blower damage as common sources of noise.
Step 5: Check Visible Mechanical Parts
With power still off, look for:
- A cracked, bent, or rubbing blower wheel
- A motor plate that has shifted out of position
- Loose visible fasteners
- Damaged grille springs
- Heavy corrosion
- Water marks inside the housing
- A model number and parts label
Do not open the wiring compartment. If the fan has a plug-in motor plate and the manufacturer sells an exact compatible replacement, a competent homeowner may be able to exchange that assembly by following the model-specific instructions. If compatibility is uncertain, leave it to a professional.
Step 6: Reassemble and Test
Reinstall every component before restoring power. Run the fan and listen for changes. Check that the exterior wall or roof damper opens. A damper that remains closed can make a good motor appear weak.
If noise or weak airflow returns immediately, more cleaning is unlikely to fix the underlying problem.
Why a Clean Fan Can Still Have Weak Airflow
The fan housing is only the beginning of the air path. Moist bathroom air must travel through a duct and discharge outdoors. ENERGY STAR notes that bathroom exhaust fans should vent directly to the outdoors, where they can remove humid air close to its source.
Common restrictions include:
- Flexible duct crushed under storage or insulation
- A sag that collects condensation
- Too many tight elbows
- A long duct run for the fan’s capacity
- A smaller duct than the fan outlet requires
- Tape failure or a disconnected joint
- A stuck backdraft damper
- An exterior hood blocked by paint, debris, nests, or corrosion
- No adequate path for replacement air to enter the bathroom
Do not vent a bathroom fan into an attic, soffit cavity, garage, or ceiling space. That relocates moisture instead of removing it from the building.
If the grille becomes wet in cold weather, condensation may be forming inside an uninsulated or poorly routed duct. Water can then run back toward the fan. An attic inspection may be necessary to check duct slope, insulation, seams, and termination. Because the housing contains electrical components, recurring water at the grille deserves prompt professional attention.
Is the Fan Properly Sized?
A successful repair restores the intended airflow. It cannot make an undersized fan suitable for a large room or compensate fully for a poor duct system.
The Home Ventilating Institute’s bathroom ventilation guidance recommends approximately 1 CFM per square foot for bathrooms up to 100 square feet. For rooms above 100 square feet, HVI recommends adding capacity based on fixtures: 50 CFM each for a toilet, shower, or bathtub and 100 CFM for a jetted tub. Local code and project conditions still govern the final selection.
Also compare sound ratings. Fan sound is measured in sones. A quieter rating can make homeowners more willing to run the fan long enough, but sound alone does not prove good installed airflow.
HVI recommends running bathroom ventilation for about 20 minutes after use. A timer or humidity control can help, provided it is selected and installed for the approved fan and local requirements.
Repair the Motor or Replace the Entire Fan?
The cheapest part is not always the lowest-cost solution. Compare the condition of the whole ventilation path.
Condition | Motor or blower assembly may make sense | Full fan replacement may make sense |
Existing housing | Secure, dry, and undamaged | Rusted, loose, damaged, or poorly sealed |
Replacement part | Exact manufacturer-approved assembly is available | Model is unknown, obsolete, or has no verified compatible parts |
Airflow | Fan met the room’s needs before the motor problem | Fan was weak even when clean and operating normally |
Duct | Correctly sized, connected, and terminated outdoors | Duct diameter, route, or termination needs correction |
Noise | Noise began with a worn or damaged motor assembly | Housing design and original fan are inherently loud |
Controls | Existing switch or timer suits the room | Humidity sensing, a timer, lighting, or other controls are being added |
Ceiling work | Existing motor plate can be serviced from below | Housing removal, framing access, drywall repair, or relocation is required |
Before buying a part, photograph the model label, motor plate, plug, housing dimensions, duct outlet, and grille clips. Match the complete model and revision, not just the brand name.
When to Call an Electrician or Remodeling Contractor
Call a qualified professional when:
- The breaker or GFCI trips more than once
- You smell burning or see charring, melted insulation, or heat damage
- The fan, light, heater, or humidity sensor cycles unpredictably
- Electrical testing or wiring changes are required
- The fan is being relocated or a new circuit or control is needed
- The unit is installed over a tub or shower and its listing or protection is uncertain
- The housing is wet or water has reached electrical components
- The duct terminates inside the building or cannot be inspected safely
- Ceiling, framing, roofing, or exterior-wall work is involved
- The bathroom has recurring mold, peeling paint, swollen trim, or damaged drywall
For related electrical planning, read how to change a bathroom light fixture safely before deciding whether several ceiling components should be addressed together.
If the bathroom needs multiple trades, use the bathroom remodel planning checklist to coordinate ventilation, lighting, waterproofing, finishes, and inspections. The guide to who to hire for a bathroom remodel also explains when a coordinated contractor is more practical than separate repair calls.
Bathroom Fan Permits in Mission Viejo
Permit requirements depend on the jurisdiction and scope. The City of Mission Viejo’s Residential Bathroom Remodels handout identifies replacement or alteration of electrical work and the exhaust fan as permit-related bathroom work. It also lists mechanical ventilation requirements for remodels, including outdoor duct termination and airflow provisions.
A simple grille cleaning is not the same as replacing or altering the fan system. Before changing the housing, wiring, duct route, control, or fan location, confirm the requirements for the project address. UKB’s bathroom remodeling permit requirements provide additional questions to raise with the local building department and contractor.
Prevent the Same Problem From Returning
Clean the Fan at Least Annually
HVI recommends routine cleaning at least once a year. A heavily used bathroom, dusty home, or continuously operating fan may need more frequent checks. Follow the product manual and never allow water into electrical parts.
Run the Fan Long Enough
Turn the fan on before bathing and let it continue after the moisture source stops. A timer or humidity control can improve consistency, but the correct setting depends on the product and local requirements.
Watch the Room, Not Just the Fan
Recurring peeling paint, soft baseboards, damp cabinets, loose flooring, stained ceilings, or mold indicate that the room may have a broader moisture problem. If finishes are being replaced, select materials intended for wet conditions, including suitable flooring for high-moisture bathrooms.
Keep the Exterior Termination Clear
Check from a safe ground-level position or use a qualified professional. The damper should open while the fan runs and close afterward. Do not work from a roof or high ladder without proper training and fall protection.
Frequently Asked Questions
Why is my bathroom exhaust fan running but not removing steam?
The grille or blower may be dirty, but the problem can also be a blocked damper, crushed or disconnected duct, excessive duct resistance, insufficient makeup air, an undersized fan, or short run time. Cleaning is a good first step, but persistent weak performance calls for inspection of the entire air path.
Can I replace only the bathroom fan motor?
Sometimes. A motor or blower-plate replacement can work when the housing is sound and the manufacturer lists an exact compatible assembly. Match the full model and revision. Do not force a generic motor into a housing or alter wiring to make an incompatible part work.
Why does water drip from my bathroom fan?
Condensation may form in a cold, uninsulated, sagging, or poorly routed duct and drain back toward the housing. Rain entry at a roof or wall cap is another possibility. Shut off power if water reaches the housing and arrange an inspection of the duct and exterior termination.
How often should a bathroom exhaust fan be cleaned?
HVI recommends at least annual cleaning. More frequent cleaning may be appropriate for a high-use bathroom, a dusty environment, or a fan designed for extended operation. Use the manufacturer’s maintenance instructions.
How long should the bathroom fan run after a shower?
HVI recommends about 20 minutes after bathroom use. A timer is useful when people tend to switch the fan off too soon. Persistent fogging or damp surfaces despite adequate run time can point to an airflow or duct problem.
Do I need a permit to replace a bathroom exhaust fan in Mission Viejo?
Mission Viejo’s bathroom-remodel guidance identifies exhaust-fan and electrical replacement or alteration as permit-related work. The exact requirement depends on the scope, so confirm it with Building Services before replacing the housing, changing wiring, relocating the fan, or altering the duct.
Is a loud bathroom fan dangerous?
Not every loud fan is dangerous. Dust, loose clips, and vibration often cause noise. Turn the unit off and seek professional help if the noise is accompanied by burning odor, overheating, repeated breaker trips, stalled humming, sparks, charring, or water in the housing.
Get Help With a Fan Problem That Is Bigger Than the Fan
A ventilation failure may reveal a poor duct route, damaged ceiling, outdated wiring, or a bathroom that needs coordinated work. Unique Kitchen & Baths can assess ventilation as part of a broader Orange County bathroom renovation, including the ceiling, lighting, moisture-resistant finishes, shower area, and inspection sequence.
If several parts of the room need attention, review how long a bathroom remodel takes in Mission Viejo and then schedule a bathroom remodeling consultation.