How to Repair or Replace a Bathtub Drain
A bathtub drain can fail in several ways that look similar from above. A stopper may no longer hold water, the tub may empty slowly, the flange may be corroded, or a hidden gasket may leak into the ceiling or floor below. Replacing visible trim without identifying the failure can leave the real problem untouched.
How to Repair or Replace a Bathtub Drain begins with diagnosis, not removal. The drain flange, stopper, drain shoe, overflow elbow, connecting tee, and trap form one waste-and-overflow system. A defect at any of those points can produce stains, odors, movement, or water damage somewhere else.
This guide explains how an experienced remodeler separates a simple trim repair from a full drain replacement. It also shows how to protect acrylic, fiberglass, porcelain, and enameled finishes while working, and when access limitations or corrosion make professional help the prudent choice.
Contents
- 1 Diagnose the Drain Before Buying Parts
- 2 Decide Whether Repair or Replacement Makes Sense
- 3 Prepare Access and Protect the Tub
- 4 Remove the Stopper and Drain Flange Carefully
- 5 Inspect the Drain Shoe, Gaskets, and Tub Opening
- 6 Install the Repaired or Replacement Assembly
- 7 Test the Drain and Overflow Before Closing Access
- 8 Account for Hidden Conditions That Change the Job
- 9 Prevent Future Bathtub Drain Problems
- 10 Know When to Call a Plumbing or Remodeling Professional
- 11 Frequently Asked Questions
- 12 Conclusion: Fix the Source and Preserve Service Access
Diagnose the Drain Before Buying Parts
The first step in how to repair or replace a bathtub drain is to decide whether the symptom comes from a clog, stopper, flange seal, drain shoe, overflow gasket, or piping connection. A few controlled tests can prevent unnecessary demolition and the wrong replacement parts.
Separate Slow Drainage From a Failed Stopper
If water remains in the tub because it drains slowly, remove accessible hair and soap buildup before replacing hardware. A stopper that will not stay closed is different: the mechanism may need cleaning, adjustment, or a matching replacement. Toe-touch, lift-and-turn, push-pull, trip-lever, and cable-operated assemblies do not share the same removal method.
Oatey’s slow-drain troubleshooting advice recommends starting with accessible debris and appropriate mechanical clearing methods. Avoid assuming that a stronger chemical is the answer. Harsh products can damage finishes, create hazardous splashback during disassembly, and complicate later plumbing work.
Identify the Leak With Controlled Water Tests
Dry the tub, access opening, and ceiling below before testing. First run a small stream directly into the drain without wetting the flange area. Next close the stopper, add shallow water, and watch the drain shoe and piping. Then raise the level near the overflow and inspect the overflow gasket and elbow. Test one condition at a time and dry between tests.
A leak that appears only while the tub is full can point to the flange seal or drain-shoe gasket. A leak that appears when water reaches the overflow suggests the overflow assembly. Moisture that follows draining may come from a slip joint, tee, trap, or cracked pipe. If water has already damaged cabinetry or adjacent finishes, the same cause-first approach used when repairing a water-damaged bathroom vanity applies: stop the source before restoring the surface.
Decide Whether Repair or Replacement Makes Sense
A practical answer to how to repair or replace a bathtub drain depends on the failed component and the condition of the concealed assembly. A repair preserves sound piping, while replacement is appropriate when wear, incompatibility, or corrosion extends beyond the visible stopper.
Repair When the Waste-and-Overflow Body Is Sound
A stopper may only need adjustment, cleaning, a new seal, or a model-specific cartridge. A sound drain flange can sometimes be resealed if the threads, crossbars, tub surface, and drain shoe remain intact. An overflow plate can be tightened or paired with a new gasket when the elbow is aligned and undamaged.
Match parts by manufacturer and model whenever possible. A trim piece that threads into the opening is not necessarily compatible with the existing shoe or stopper mechanism. Photograph the assembly before disassembly and bring the old part to a plumbing supplier if identification is uncertain.
Replace When Corrosion, Movement, or Mismatch Is Present
Replace the affected assembly when the flange is deeply corroded, threads are stripped, crossbars are broken, the drain shoe moves excessively, or the existing parts cannot seal reliably. A full waste-and-overflow replacement may be necessary if the tee, overflow elbow, or connecting tubes are cracked or badly corroded.
Finish changes can also justify replacement, but appearance should not outrank compatibility. The new trim, stopper, flange, gaskets, and waste body must work as a system. Mixing decorative trim with an unknown old body can produce a drain that looks finished but cannot be serviced or sealed correctly.
Prepare Access and Protect the Tub
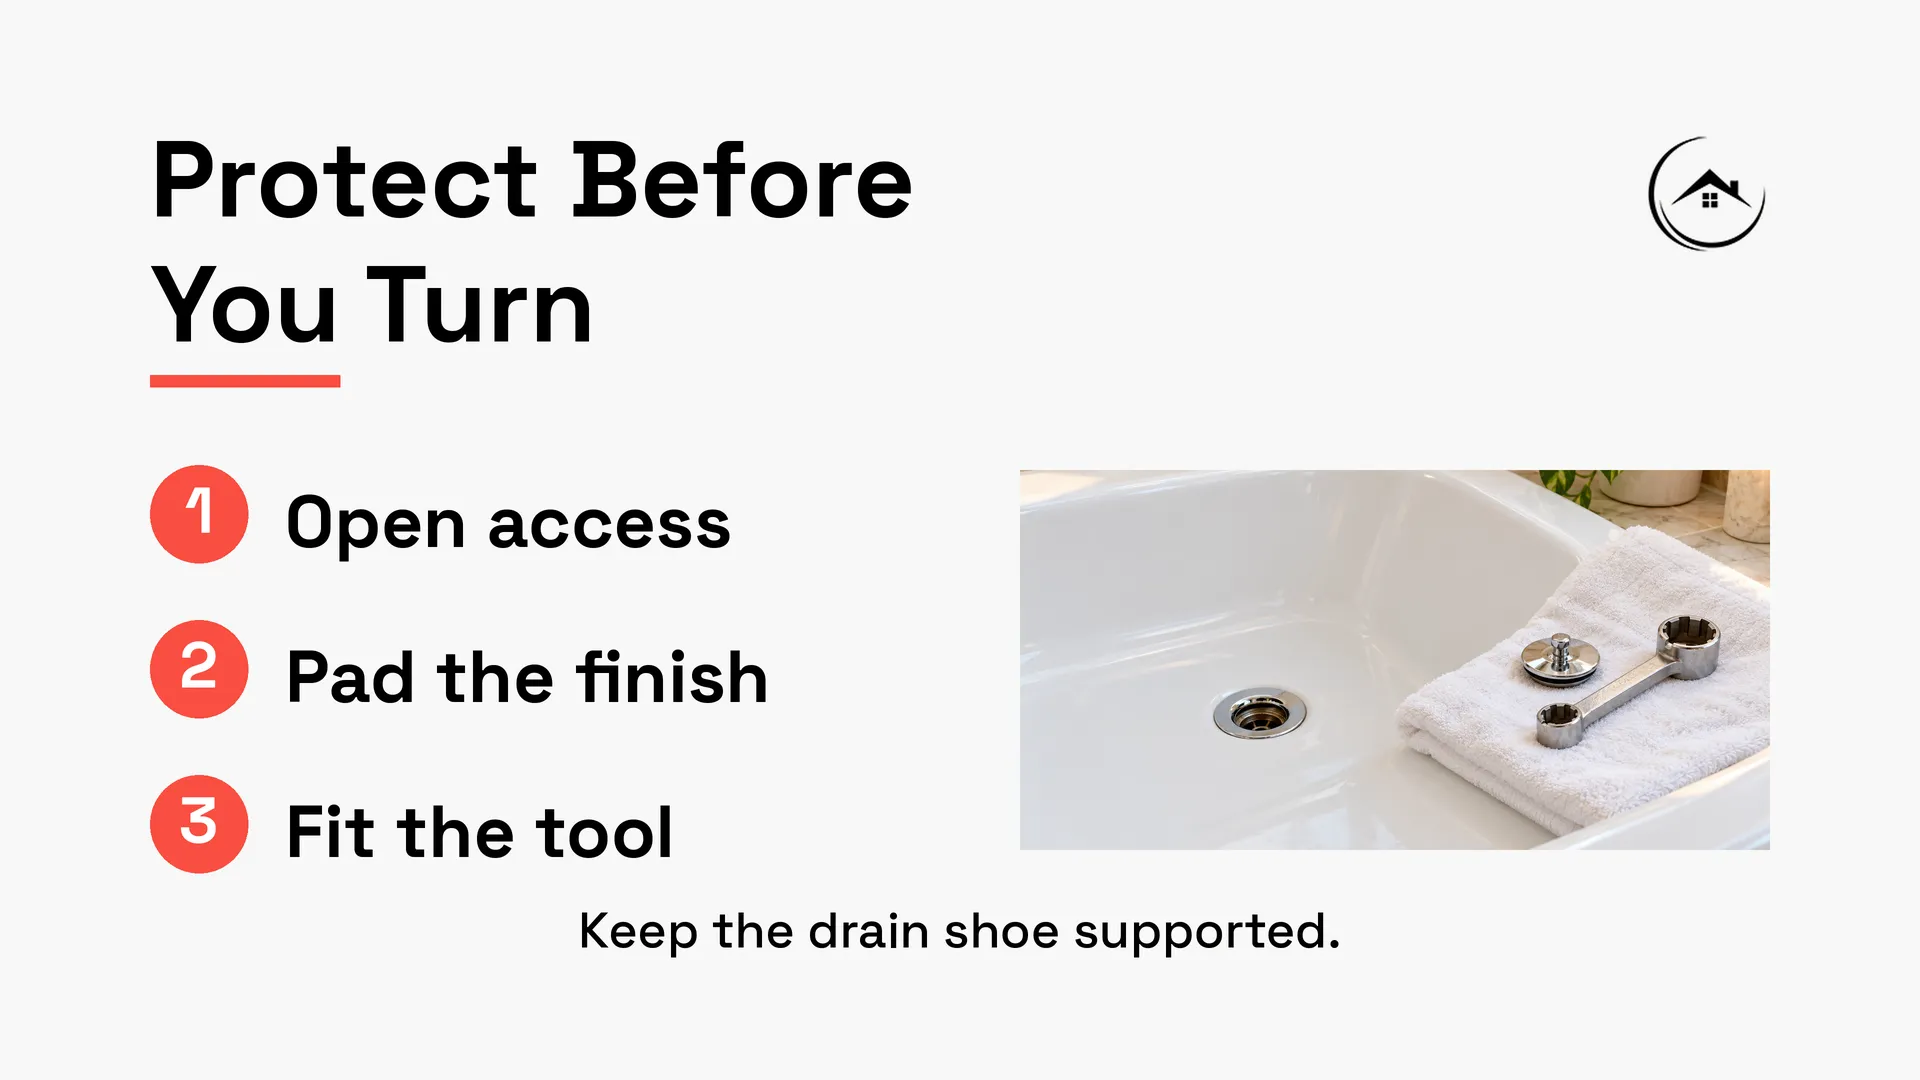
Preparation determines whether how to repair or replace a bathtub drain remains a controlled plumbing task or becomes a damaged-finish repair. Secure access to the drain shoe before applying force, and shield every surface a tool could touch.
Find the Service Opening and Inspect Below
Look for an access panel behind the faucet wall, inside an adjacent closet, or in the ceiling below. Use a light and mirror to inspect the drain shoe, overflow elbow, tee, and trap. If no access exists, do not assume the drain shoe will stay aligned after the flange is removed. Older or corroded piping may shift, separate, or drop.
Stop using the tub and protect the area below from incidental water. The supply valves do not normally need to be closed for drain work, but they should be accessible if nearby faucet connections are disturbed. In multifamily buildings, confirm access and repair responsibilities before opening a shared wall or ceiling.
Gather Correct Tools and Finish Protection
Typical tools include the driver or wrench required for the stopper, a tub-drain removal wrench or internal extractor, pliers, a plastic scraper, rags, a flashlight, and the sealant or plumber’s putty approved for the new parts and tub material. Keep replacement gaskets and the manufacturer’s instructions within reach.
Cover the tub floor and rim with a clean, nonabrasive pad. Tape cardboard over nearby finish areas, but keep adhesive away from delicate coatings unless approved. A screwdriver forced against drain crossbars is more likely to slip and chip porcelain than a properly fitted drain tool. Never use the tub wall as a pry point.
Remove the Stopper and Drain Flange Carefully
The removal stage of how to repair or replace a bathtub drain requires patience because the flange may be held by old putty, corrosion, or damaged threads. Protect the drain shoe from twisting, and stop if the tub flexes or the tool loses purchase.
Remove the Stopper by Its Actual Mechanism
For a toe-touch or lift-and-turn stopper, identify whether the cap unthreads from a shaft or whether a set screw releases the body. A trip-lever assembly may have a linkage or plunger behind the overflow plate. Withdraw those parts gently and note their orientation. Photograph washers, linkages, and adjustments before separating them.
Do not force a decorative cap simply because it resembles another model. Some products have hidden fasteners or reverse-threaded components. Search the model instructions when available. If the stopper is the only failed part, this may be the end of disassembly.
Break the Flange Seal Without Levering on the Tub
Seat the drain wrench or extractor fully, then apply steady counterclockwise force. Keeping the tool square reduces the chance of breaking the crossbars. If the flange does not move, do not add an uncontrolled impact or a long cheater bar while the shoe is unsupported. Corroded metal can tear, and acrylic or fiberglass can crack around the opening.
A second person at the access opening can stabilize the shoe and watch for movement. Once the threads release, unthread the flange by hand while maintaining the shoe’s alignment. Remove old putty or sealant with a plastic scraper and an approved cleaner.
Inspect the Drain Shoe, Gaskets, and Tub Opening
Good decisions about how to repair or replace a bathtub drain are made while the parts are clean and visible. The condition of the opening, threads, gasket, and concealed shoe determines whether a new flange can seal or whether more of the assembly must be replaced.
Check Threads and Alignment Before Installing Anything
Inspect both sets of threads for corrosion, cross-threading, cracks, and remaining debris. The drain shoe should sit centered beneath the tub opening without being forced sideways. If it drops out of reach, pulls against the tub, or will not align naturally, stop and improve access rather than catching the threads at an angle.
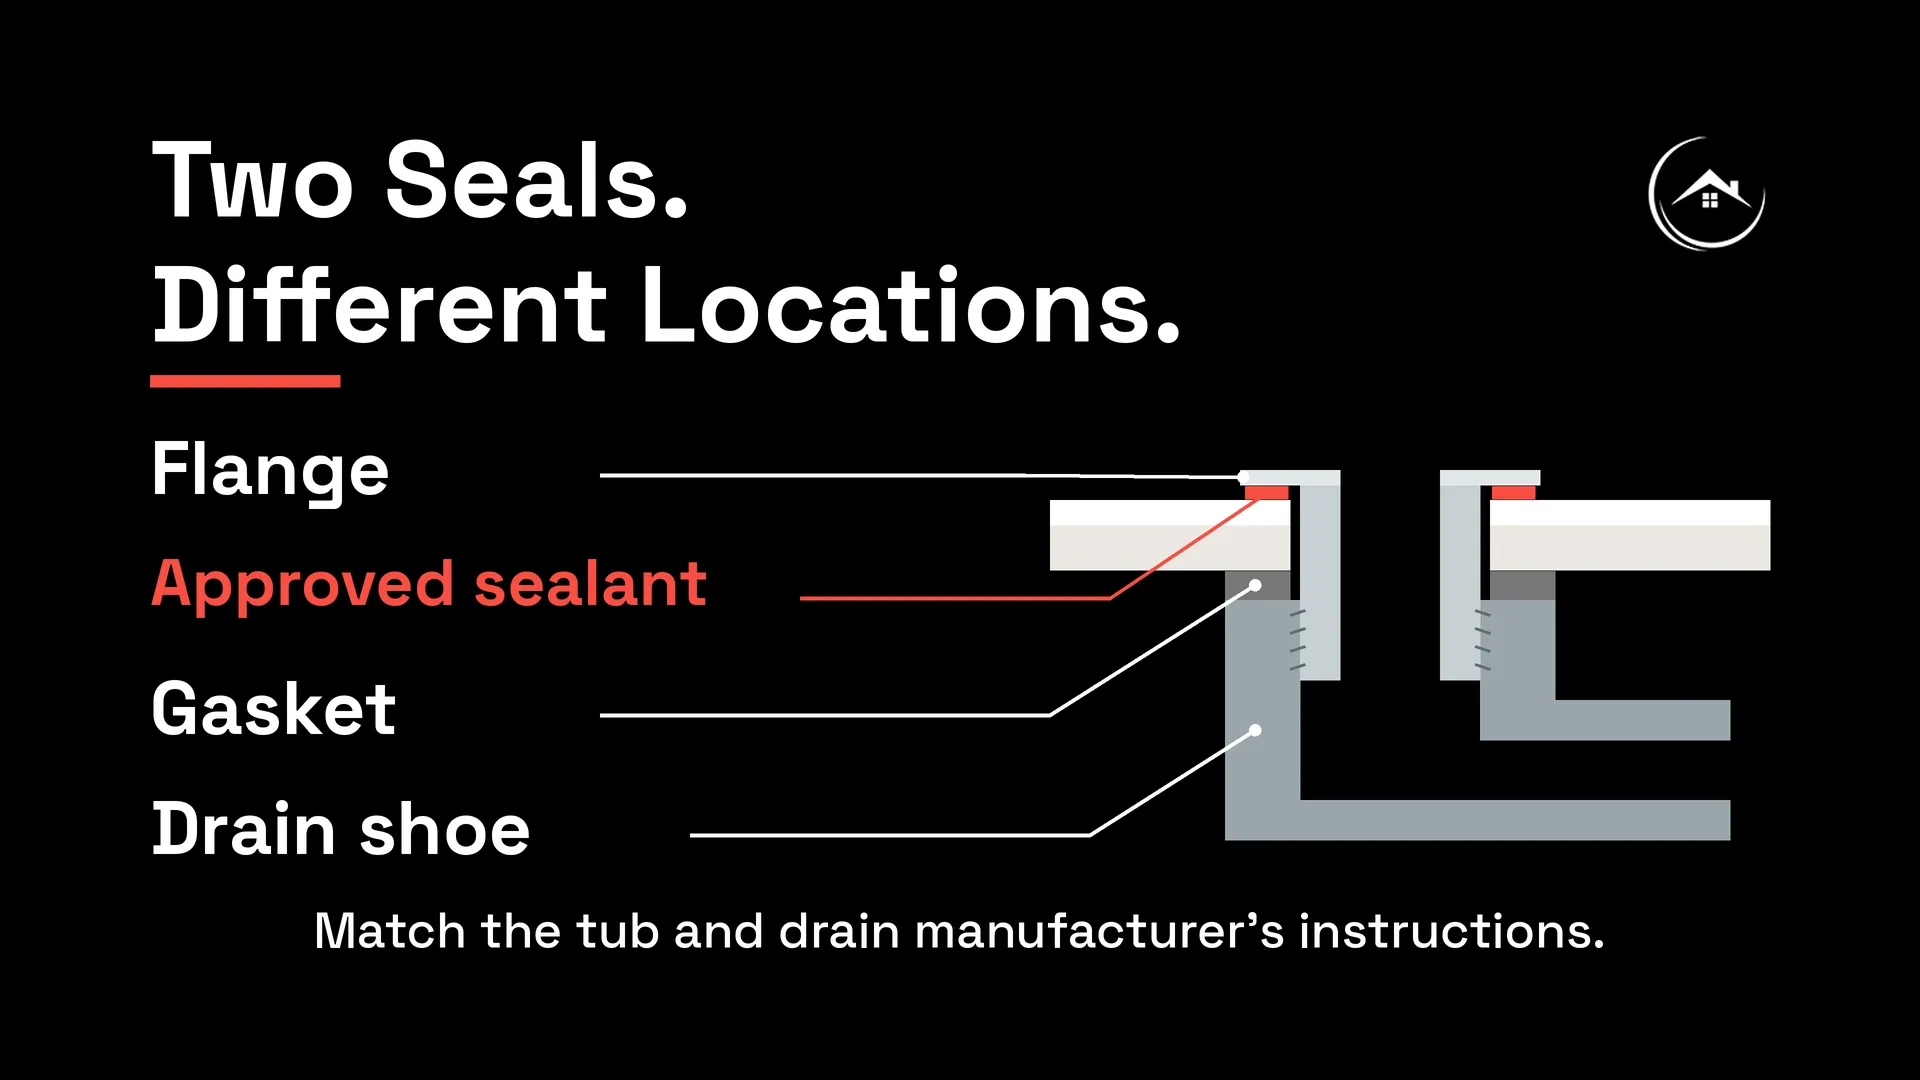
Look at the gasket between the shoe and underside of the tub. A hardened, split, swollen, or displaced gasket should be replaced with the correct part. The tub surface around the opening must be flat enough for the flange to seal. Chips, rust, or cracks may require repair before reassembly.
Confirm Material Compatibility
Plumber’s putty is common under some metal flanges, but it is not compatible with every acrylic, composite, stone, or specialty finish. Some manufacturers require silicone instead. Use the product specified for the exact drain and tub rather than repeating whatever was removed.
The Oatey bathtub drain installation guide illustrates the full relationship among the drain spud, elbow, overflow, connecting pipe, and leak test. Even when only the flange is being replaced, those concealed parts need correct alignment and support.
Install the Repaired or Replacement Assembly
The installation portion of how to repair or replace a bathtub drain should create compression without distorting the tub or cross-threading the shoe. Start every threaded connection by hand and treat resistance as a warning, not a reason to apply more force.
Seat the Gasket and Start the Flange by Hand
Position the correct gasket against the underside of the tub and align the drain shoe. Apply the specified putty or sealant beneath the flange in a continuous amount. Thread the flange into the shoe by hand for several full turns. It should advance smoothly. If it binds immediately, back it out and correct alignment.
Tighten with the proper tool only to the manufacturer’s requirement. Over-tightening can squeeze the gasket out of position, deform a thin acrylic tub, crack a finish, or damage threads. Remove excess putty or sealant without scratching the surface.
Reassemble and Adjust the Stopper
Reinstall the stopper, linkage, or trip lever in the documented orientation. Adjust it so the tub holds water when closed and drains freely when open. A trip-lever plunger may require several small length changes, while a lift-and-turn or toe-touch stopper may have a depth adjustment at the shaft.
Operate the stopper repeatedly before closing the access panel. It should move without scraping, rocking, or requiring excessive force. Keep any model-specific removal tool and instructions with the homeowner records.
Test the Drain and Overflow Before Closing Access
Testing is part of how to repair or replace a bathtub drain, not a final courtesy. The assembly should pass both a standing-water test and a draining test while every joint remains visible.
Perform a Static Fill and Overflow Test
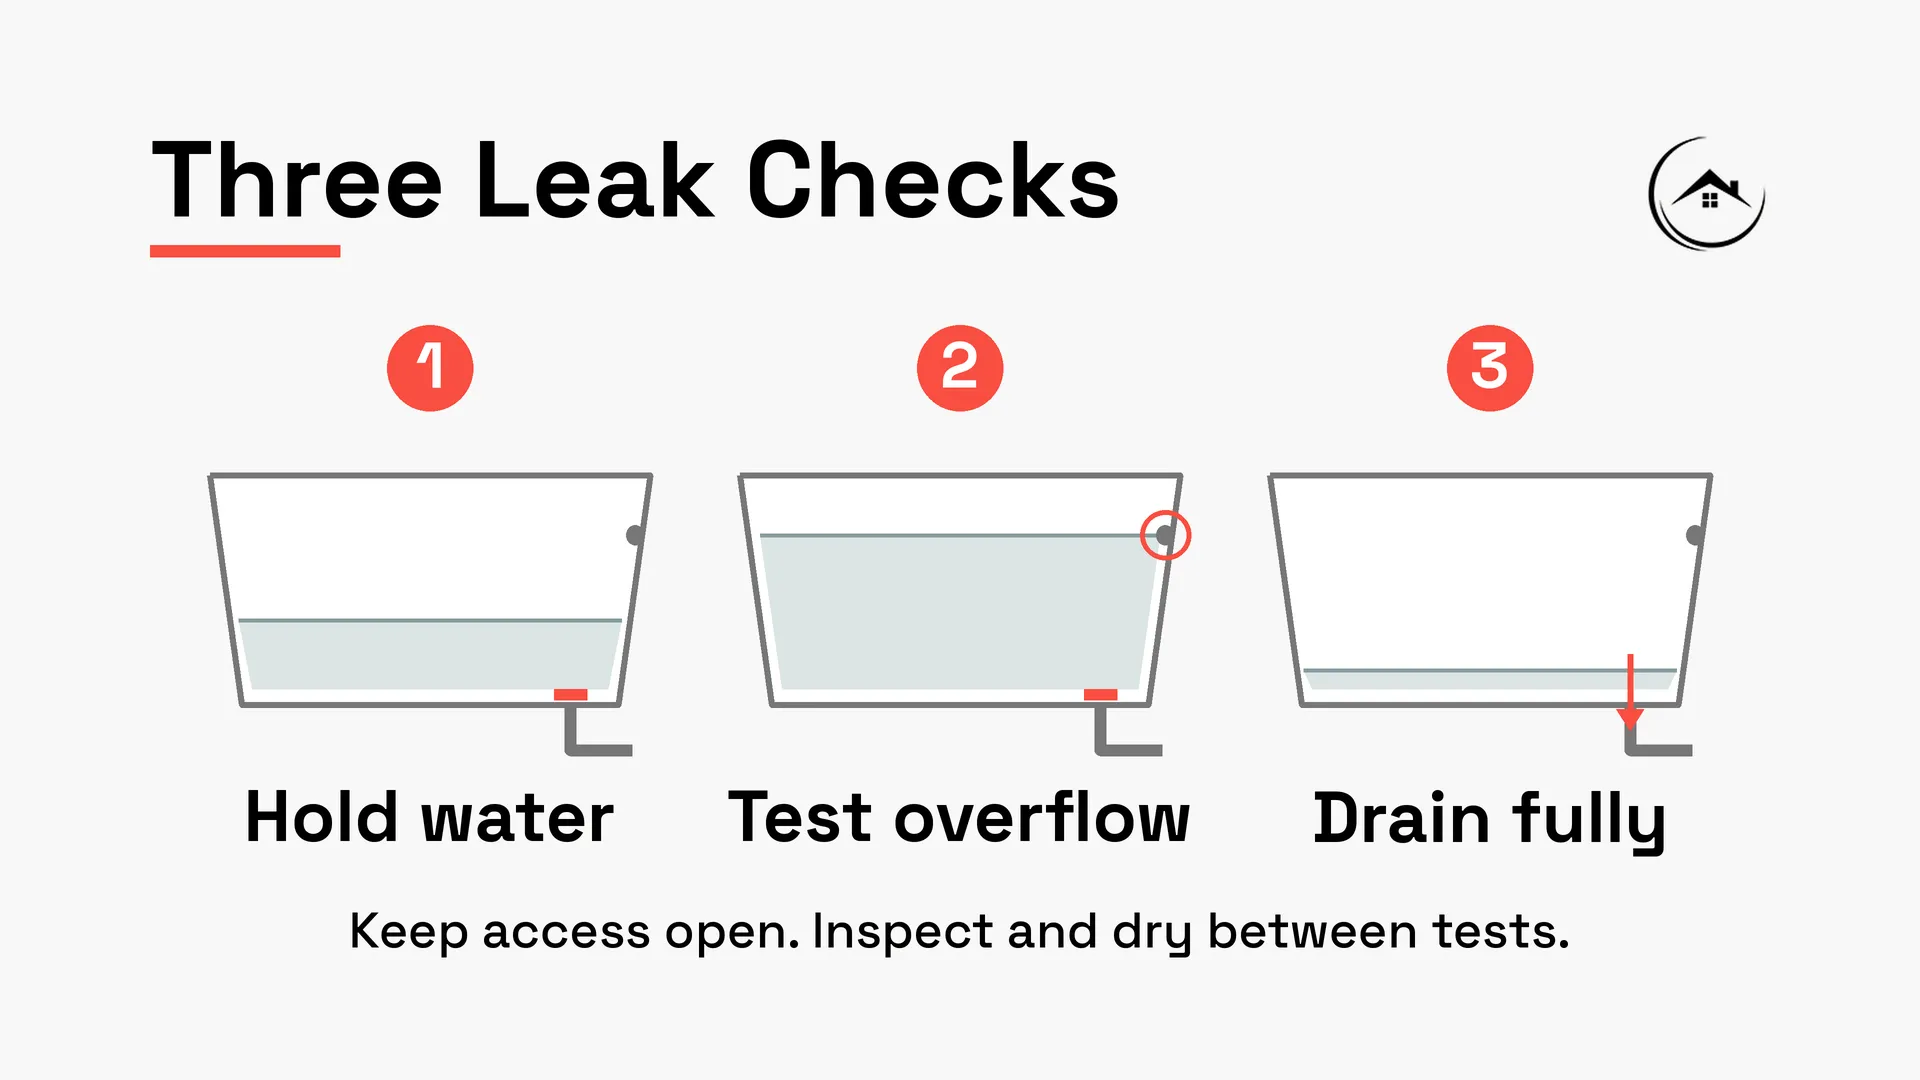
Close the stopper and add several inches of cold water. Mark the level and wait long enough to reveal a slow leak. Inspect the flange, shoe gasket, and concealed connections with a dry tissue or paper towel. Then raise the water until it begins entering the overflow and inspect the overflow gasket and elbow.
Oatey’s bath waste and overflow leak test advises filling until water reaches the overflow and checking all connections behind the tub. Cold water is useful for an initial test because it reduces burn risk and avoids thermal movement that could confuse the first inspection.
Perform a Full-Flow Drain Test
Release the stopper and watch the system while the full tub volume drains. A connection can remain dry under static pressure but leak when flow and vibration increase. Check the shoe, tee, trap, slip joints, and ceiling below. Repeat the test after wiping all surfaces dry.
Do not close an access panel or repair drywall after a single quick rinse. If the drain is part of a wider remodel, planning around master bathroom layout ideas can preserve service access and keep future plumbing repairs from requiring unnecessary finish removal.
Account for Hidden Conditions That Change the Job
This additional section expands how to repair or replace a bathtub drain beyond the visible hardware. Older piping, inaccessible traps, and damaged tub materials can turn a routine flange replacement into a larger repair.
Treat Corroded or Inaccessible Piping as a System Issue
Galvanized steel, aging brass, thin tubular components, and brittle plastic may fail when disturbed. If the shoe rotates with the flange, the overflow tube crumbles, or the trap connection is concealed in a slab, stop before the damage spreads. A plumber may need to open a targeted access area and replace the waste-and-overflow assembly.
Recurring stains below the tub can also indicate a leak outside the drain, such as a valve, spout connection, shower riser, or failed wall waterproofing. Controlled tests should isolate those sources before the drain is blamed.
Evaluate Tub Damage Before Tightening New Hardware
A cracked fiberglass or acrylic opening cannot be repaired by tightening the flange harder. Rust around an enameled steel or cast-iron opening may prevent a durable seal. A chipped porcelain surface may need stabilization so water cannot travel beneath the finish.
When the tub, surround, and drain are all near the end of their service life, compare repair costs with a coordinated remodel. Reviewing walk-in shower remodeling ideas can help a household decide whether the existing tub still supports its long-term needs rather than making the decision on trim color alone.
Prevent Future Bathtub Drain Problems
Prevention completes how to repair or replace a bathtub drain by reducing hair buildup, chemical damage, and unnoticed leaks. Simple maintenance also makes later service less destructive.
Control Hair and Clean Mechanically First
Use a removable hair catcher that does not interfere with the stopper. Clean it frequently, and remove accessible buildup before flow becomes severely restricted. When deeper clearing is needed, follow the drain and piping manufacturer’s method. Do not mix chemical cleaners, and warn a plumber if any chemical is already in the system.
Keep abrasive cleaners and metal brushes away from plated trim. A damaged finish can corrode faster and make future disassembly difficult.
Inspect the Overflow and Access Area Periodically
Check the overflow plate for looseness and look behind the access panel after filling and draining the tub. A dry inspection once or twice a year can catch a flattened gasket or weeping joint before it damages framing or the ceiling below. Keep the access panel functional instead of sealing it permanently.
Persistent odor, recurring dampness, soft flooring, or staining should be investigated promptly. These symptoms can indicate trapped water or concealed material damage even when the tub appears to drain normally.
Know When to Call a Plumbing or Remodeling Professional
An honest guide to how to repair or replace a bathtub drain includes clear limits. Professional help is appropriate when removal force could damage the tub, the waste-and-overflow assembly moves, access is poor, or the leak has affected building materials.
Stop When the Tub or Drain Shoe Begins to Move
If the opening flexes, the flange crossbars break, or the shoe cannot be stabilized, stop applying torque. A plumber can use specialized extractors, create controlled access, and replace the concealed assembly without turning a stuck flange into a cracked tub.
Leaks above finished ceilings, drains embedded in slabs, and pipes shared with another unit also deserve professional evaluation. Local codes and permit requirements may apply when concealed piping is altered.
Coordinate Repairs With the Bathroom as a Whole
Unique Kitchen and Baths can assess the drain together with the tub, surround, vanity, flooring, ventilation, and access needs. That broader view is valuable when moisture has already affected adjacent finishes or when a drain repair overlaps with a planned bathroom renovation.
Frequently Asked Questions
These concise answers address the questions homeowners most often ask about how to repair or replace a bathtub drain. Product-specific instructions still control the parts, sealant, tightening method, and test procedure.

UKB
Unique Kitchen & baths is a family-owned business that is committed to providing high-quality kitchen and bathroom remodeling, as well as flooring installations at affordable prices.