How to Install a Shower Pan That Passes a Flood Test
A shower floor can look perfect on the day the tile is grouted and still fail inside the assembly. Water does not stop at the tile surface. It moves through grout and mortar, follows low spots, and finds fastener holes, poorly sealed corners, blocked weep holes, or an incompatible drain connection. The lasting work happens before the finished surface is installed.
This guide explains how to plan and install the three most common shower-pan approaches: a prefabricated shower base, a traditional mortar bed with a clamping-drain liner, and a direct-bonded waterproofing system. Those methods are not interchangeable. The drain, membrane, corners, sealants, and test procedure must belong to one approved system and follow its current instructions.
Contents
- 1 Choose One Complete Shower-Pan System
- 2 Verify the Permit, Drain, and Room Conditions
- 3 Prepare the Framing and Drain Opening
- 4 Create the Required Slope and Support
- 5 Install the Waterproofing Without Low Penetrations
- 6 Flood Test Before Covering the Pan
- 7 Complete the Drainage Layer and Tile Surface
- 8 Prevent Hidden Water Paths at Benches and Niches
- 9 Coordinate the Pan With Curbless Access and Glass
- 10 Know When to Hire a Professional
- 11 Frequently Asked Questions
- 11.1 Does tile make a shower pan waterproof?
- 11.2 Does a traditional liner need a pre-slope?
- 11.3 Can I combine a clamping drain with a surface membrane?
- 11.4 How long should a shower pan be flood tested?
- 11.5 Can I screw cement board through the liner near the floor?
- 11.6 Why does a shower pan smell even when it does not leak?
- 12 Conclusion: Prove the Waterproofing Before Tile
Choose One Complete Shower-Pan System
The first decision in how to install a shower pan is not where to begin cutting. It is which waterproofing method matches the drain, floor structure, shower dimensions, tile plan, and desired curb. Unique Kitchen and Baths can evaluate these connected conditions through its bathroom remodeling service before materials are ordered.
Understand the three common construction methods
A prefabricated acrylic, fiberglass, solid-surface, or composite base arrives with its finished walking surface and factory-formed slope. It is usually set on a prepared subfloor, connected to the specified drain, supported as the manufacturer requires, and secured to framing. It can reduce waterproofing complexity, but the opening, drain location, wall preparation, and support still have to be exact.
A traditional tiled pan uses a pre-sloped mortar layer, a flexible PVC or CPE liner connected to a clamping drain, and a second mortar bed above the liner. Water that reaches the liner travels to the drain’s weep holes. That path fails if the liner lies flat, the weep holes are packed with mortar, or fasteners pierce the liner too low.
A direct-bonded system places the waterproof layer immediately beneath the tile and connects it to a compatible bonding-flange or linear drain. It may use a preformed foam tray or a sloped mortar bed. This method does not use a separate buried liner and clamping-drain detail unless the manufacturer supplies an approved adapter assembly.
Mixing a foam tray from one brand, a drain from another, and a liquid membrane applied by guesswork can leave no manufacturer responsible for the assembly. Even products that appear physically compatible may have different flange dimensions, cure times, seam treatments, or approved sealants.
Read the drain and waterproofing instructions together before buying. Confirm the substrate, minimum mortar thickness, membrane overlap, curb treatment, fastener zones, and flood-test timing. If the documents conflict, contact the manufacturer or use a complete system with published details.
Verify the Permit, Drain, and Room Conditions
A shower pan is part of the plumbing and waterproofing system, not simply a tile substrate. Planning should account for local inspection requirements, drain and vent conditions, structural movement, room access, and the finished height at the bathroom floor.
Confirm local inspection and flood-test requirements
Moving a drain, changing supply plumbing, replacing a waterproof receptor, or altering framing can require permits and inspections. UKB’s bathroom remodeling permit guide explains why the scope, local jurisdiction, and type of alteration affect the answer. Check requirements before closing the floor or walls, because an inspector may need to see the drain connection, liner, or water test.
Ask what test depth and duration the local authority requires and what type of test plug is acceptable. A manufacturer’s minimum test may not replace a longer local requirement. Schedule the inspection before tile installation so a failed test can be corrected without demolition.
Inspect the subfloor, joists, and drain access
Remove damaged material until the remaining subfloor is dry, flat, and firmly attached. Look for rot around the drain, deflection between joists, loose seams, proud fasteners, and previous notches that weakened framing. A mortar bed or foam tray cannot compensate for a moving floor.
Confirm whether the drain can be connected from below. If not, the drain height and pipe connection may need to be completed before the base is placed. Identify joists, plumbing, electrical lines, and any radiant floor system before drilling or cutting. A drain that lands on a joist requires a designed solution, not an improvised notch.
Plan the transition outside the shower
Calculate the finished height of the subfloor, slope, waterproofing, mortar, tile, and curb. The bathroom floor should meet the shower entrance cleanly without creating a trip point or a low area where splash water collects. Curbless designs need additional planning for recess depth, joist direction, door swing, glass, and water containment.
Choose adjacent finishes that tolerate real bathroom conditions. UKB’s guide to flooring for high-moisture bathrooms can help homeowners compare materials outside the shower, where wet feet and cleaning water still affect performance.
Prepare the Framing and Drain Opening
Accurate preparation makes the waterproofing layer easier to install without folds, voids, or strained connections. Square walls, solid blocking, a clean subfloor, and a correctly located drain are the foundation for every pan type.
Make the shower footprint square and stable
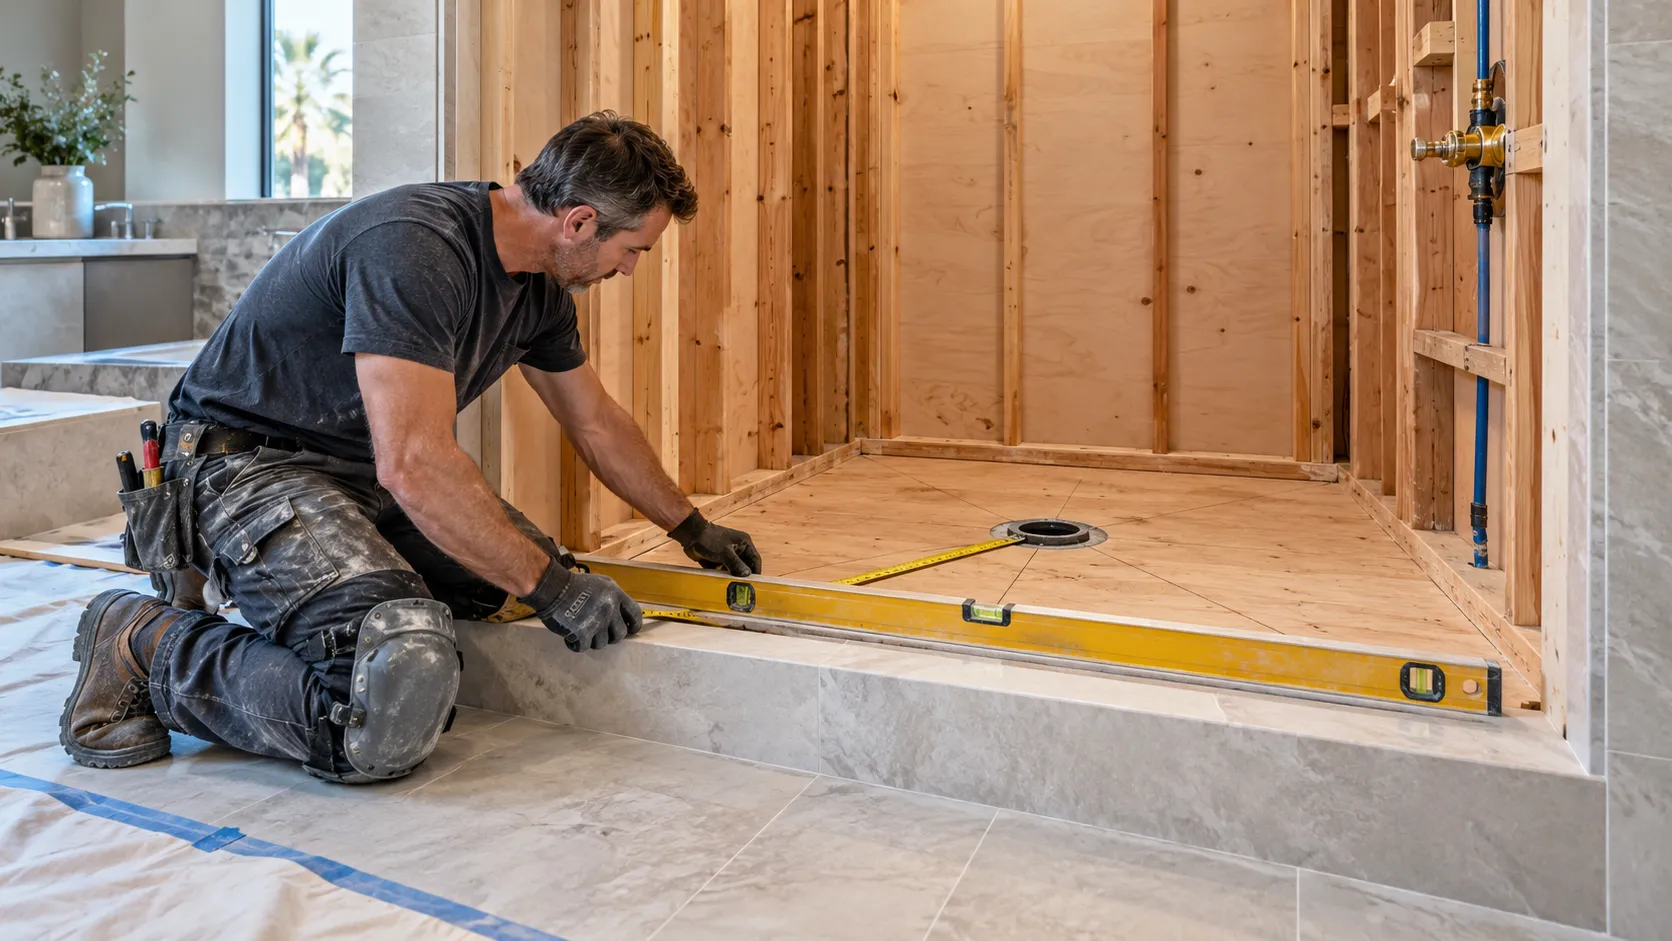
Measure the opening at the floor, curb height, and wall level. Compare both diagonals to identify an out-of-square footprint before ordering a rigid base or cutting a foam tray. Plane proud studs and correct recessed framing so backer boards and wall membranes can remain flat.
Traditional liners need solid blocking around the lower walls so the membrane can be supported without bulging. Recess or fur the framing as required for folded liner corners, which are thicker than the field. Do not trim away a liner fold to make the wallboard lie flat.
Set the drain at the height required by the system
A clamping drain, bonding-flange drain, and no-caulk drain each connect differently. Dry-fit the drain and trap, verify the pipe is plumb, and confirm the flange elevation before solvent welding or tightening permanent connections. The drain should not be forced sideways to meet a misaligned pipe.
Protect the opening from debris while working. Test the waste line when required before covering it. If the drain connection, trap, or venting is uncertain, stop and involve a licensed plumber. A watertight membrane cannot correct a leaking fitting beneath the floor.
Create the Required Slope and Support
Every shower floor needs continuous support and a reliable path to the drain. The slope belongs in the structure of the pan, not in a thick layer of thin-set used to correct mistakes during tile installation.
Build a pre-slope for a traditional liner system
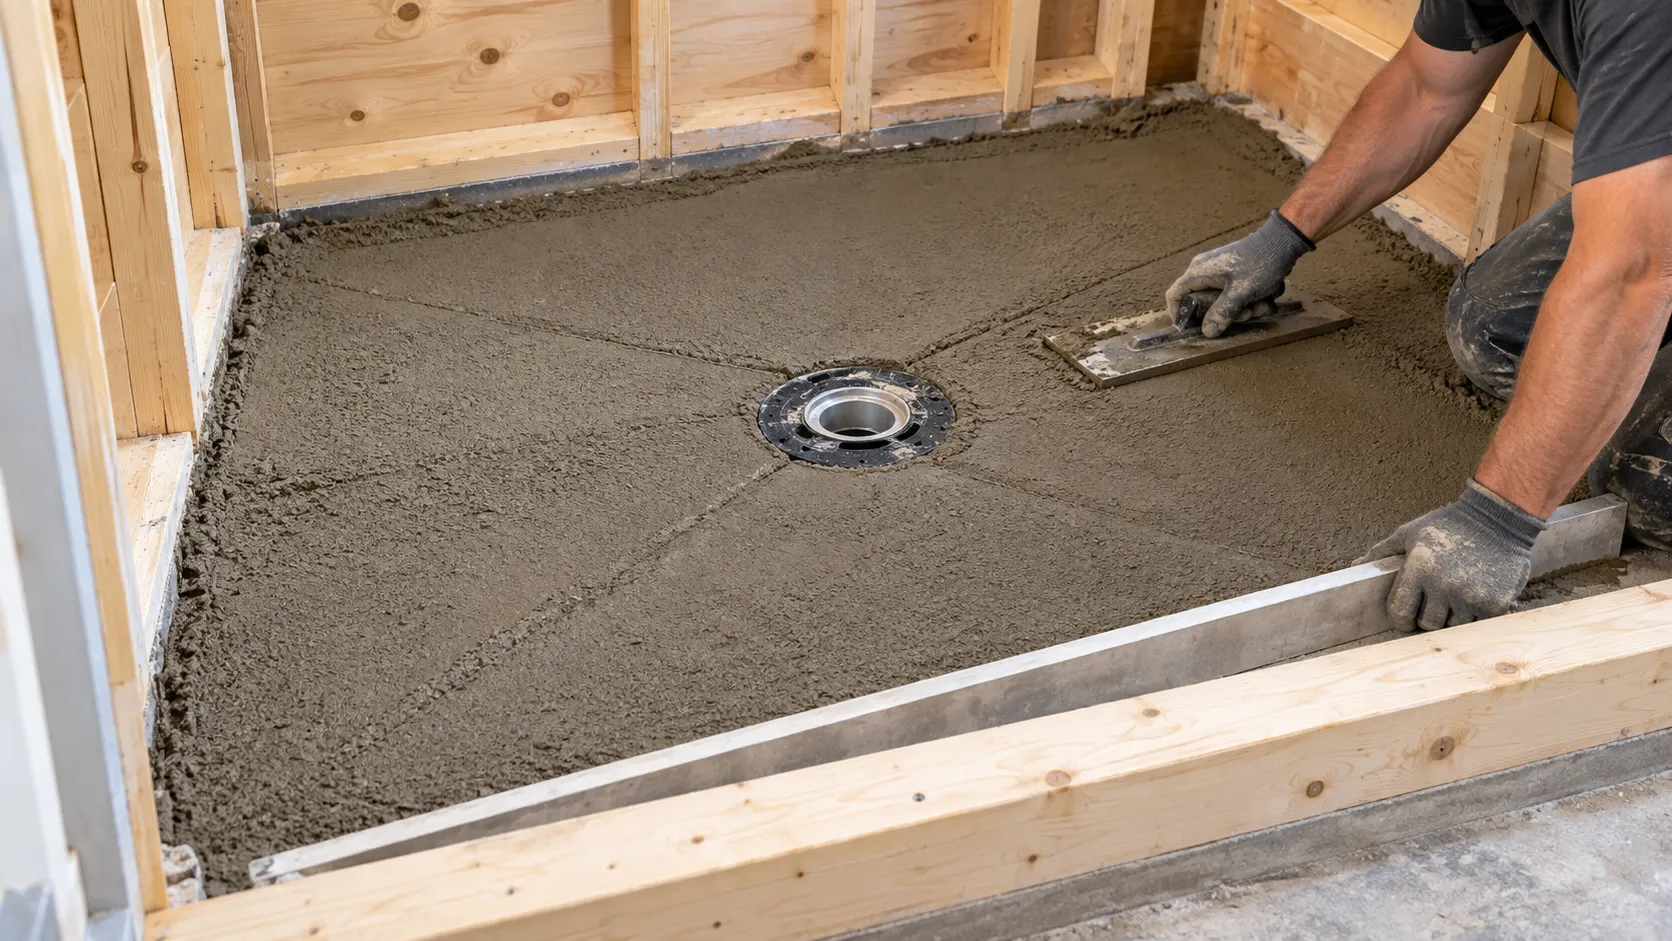
For a traditional pan, place a bonded or reinforced mortar pre-slope as required by the selected method. Oatey’s shower pan liner installation guide specifies a quarter inch per foot slope from the wall framing to the drain base for its illustrated system. Establish a level perimeter and pack the mortar firmly so there are no dips that can hold water beneath the liner.
Let the pre-slope cure according to the mortar instructions and remove sharp debris before laying the membrane. Check the entire surface with a straightedge. A slope that reaches the drain but contains local depressions can still trap water.
Set a prefabricated base on full support
Test-fit a prefabricated base without sealant or mortar. Confirm that its rim contacts the framing as designed, the floor is level, the drain aligns without stress, and the flange will meet the wall system correctly. Never assume the base will flatten when it is fastened.
Some bases require a mortar support bed while others do not. Use the mortar type, placement, and fastening method in the product instructions. Lower the base without disturbing the support, press it to the correct elevation, and check level at multiple points before the material sets.
Fit a foam tray without weakening its slope
A pre-sloped foam tray needs a flat, clean substrate and compatible thin-set mortar. Dry-fit the tray and drain first. When trimming is permitted, remove material evenly from opposing sides when possible so the perimeter height remains consistent.
Do not fill large floor depressions with extra thin-set beneath the tray. Correct the substrate first. Comb mortar with the specified trowel, embed the tray while the mortar is fresh, and lift a section during installation to confirm full coverage if the instructions call for it.
Install the Waterproofing Without Low Penetrations
Waterproofing succeeds when the field, corners, curb, drain, and wall transitions form one continuous assembly. Most failures are not in the center of the pan. They occur where the membrane changes direction or meets another component.
Detail a traditional liner at the drain and walls
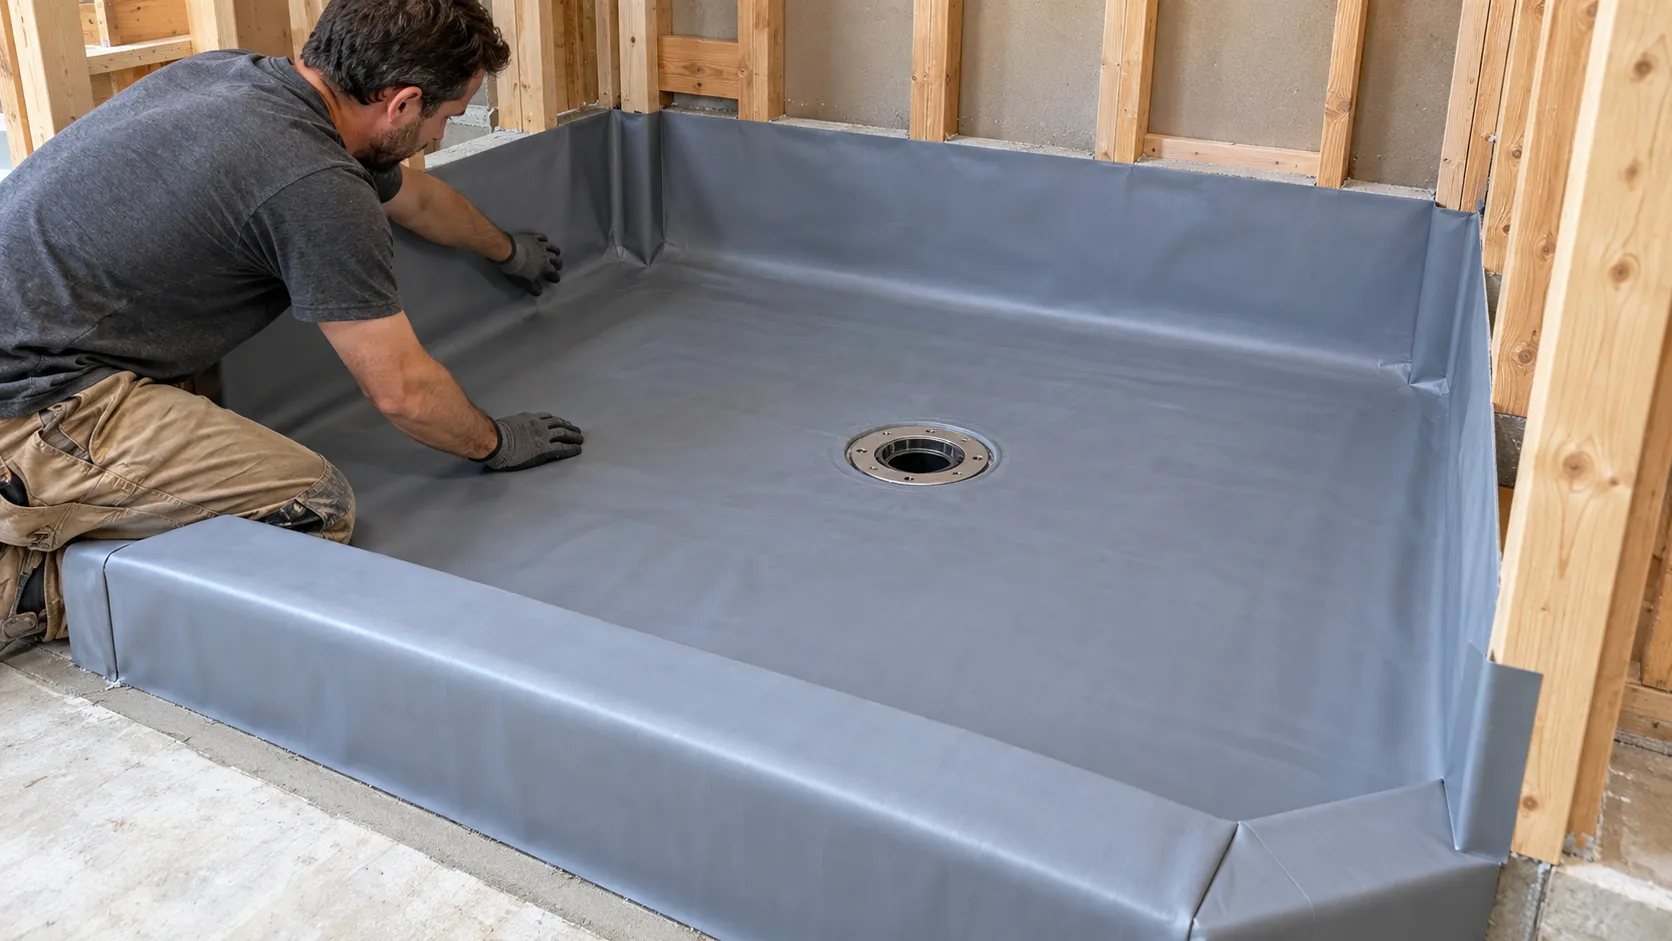
Lay the liner over a clean, cured pre-slope without stretching it. Cut only the drain opening and bolt penetrations required by the clamping assembly. Apply the manufacturer-approved sealant beneath the liner at the lower flange, then tighten the clamping ring evenly without distorting the material.
Carry the liner up the walls and over the curb to the height required by the product instructions and local code. Keep fasteners high on the walls and on the outside face of the curb. Never drive screws or staples through the liner on the shower floor, inside curb face, or curb top.
Use welded or bonded dam corners where the curb meets the jambs. These three-dimensional intersections cannot be made reliably with a flat fold alone. Use the adhesive specified for the liner material because PVC and CPE products may require different chemistry.
Seal a direct-bonded membrane system continuously
For sheet membranes, embed the material in the specified mortar, maintain the required overlap, and remove air pockets without scraping away the bond coat. Prefabricated corners reduce buildup, but every seam and penetration still needs the system’s approved treatment.
For liquid-applied membranes, substrate preparation, reinforcing fabric, wet-film thickness, dry-film thickness, number of coats, and cure conditions matter. A membrane that looks uniformly colored may still be too thin. Use the manufacturer’s wet-film gauge and do not flood test until the stated cure period has passed.
Protect the curb and wall transition
The curb receives standing splash, foot traffic, glass fasteners, and movement from adjacent framing. Maintain positive slope toward the shower on the finished curb top. Carry the waterproofing across the curb and connect it to the wall system without exposed wood or low fasteners.
Plan glass hardware before waterproofing. UKB’s shower-door installation guide explains why accurate measurements, plumb walls, and support locations matter. Avoid drilling into the horizontal curb surface when a side-mounted or adhesive-approved detail can meet the enclosure manufacturer’s requirements.
Flood Test Before Covering the Pan
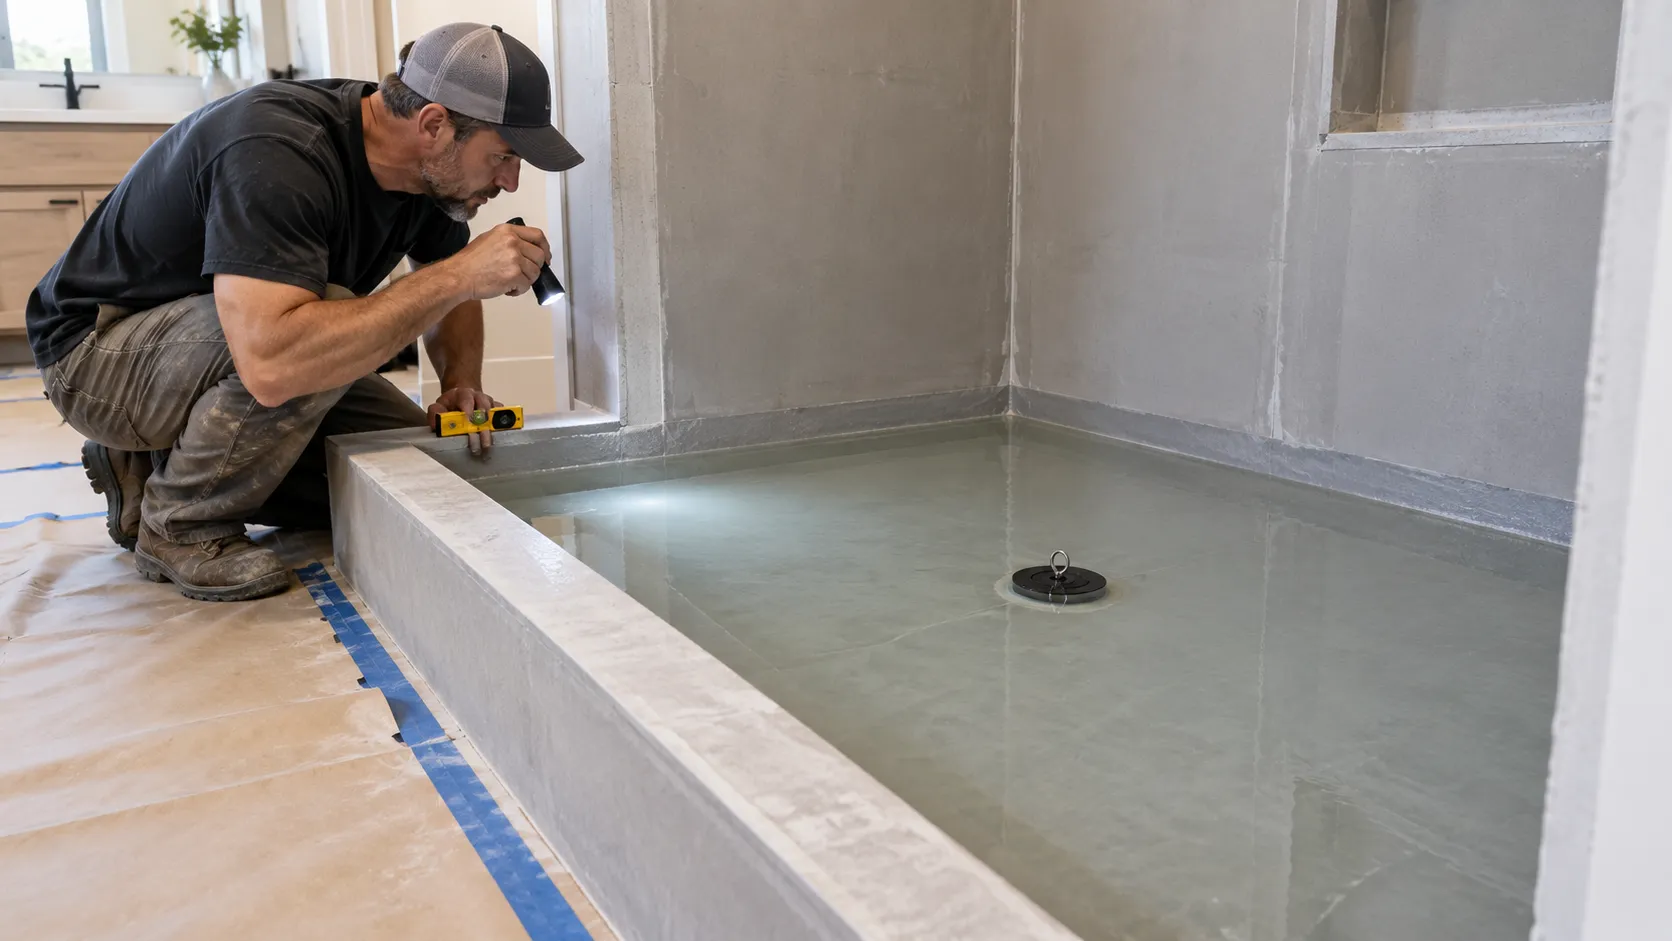
A flood test is the point where workmanship becomes evidence. It should happen after the waterproofing has cured and before mortar, tile, or wall finishes hide the seams and drain connection.
Use the correct plug and mark the water level
Place the test plug where it isolates the shower receptor and drain connection as required for the inspection. A plug placed too high may leave the drain-to-membrane connection untested. Fill slowly to the approved depth without overflowing the curb or wetting surrounding construction.
Mark the water level at a fixed point and record the start time. Oatey’s traditional-liner guide calls for letting the water stand for at least two hours for the demonstrated system, while Schluter’s shower-kit instructions recommend a water test before tile and note that building officials may require it. Follow the longer requirement set by the local authority or selected system.
Distinguish evaporation from a leak
Use a control container of water in the same room if evaporation could affect the result. Compare changes rather than assuming any drop is leakage. Inspect the ceiling below, wall bases, adjacent rooms, curb exterior, and drain area during the test.
If the level falls beyond the control or moisture appears outside the assembly, drain the pan and locate the defect. Do not add a surface coat over an unexplained failure. Repair the system using an approved method, allow the repair to cure, and repeat the full test.
Complete the Drainage Layer and Tile Surface
After a successful flood test, finish the pan without damaging the waterproofing or blocking its drainage path. The final tile surface must drain freely, but it is not the primary waterproof layer.
Protect weep holes in a traditional pan
Place pea gravel, spacers, or the drain manufacturer’s approved protector around the weep holes before packing the upper mortar bed. Keep mortar and sealant out of those passages. Set the strainer height for the planned mortar and tile thickness while preserving positive slope.
Pack the mortar bed to a consistent plane that follows the pre-slope below. Avoid walking on exposed liner unnecessarily, and use protective boards when access is required. Check for low spots before the mortar hardens.
Set tile without puncturing the waterproofing
Use mortar and tile approved for the selected waterproofing system and shower-floor application. Small-format tile often follows compound slopes more easily than large tile around a center drain. Confirm slip resistance, drain compatibility, and layout before mixing mortar.
Keep movement joints, drain gaps, and changes of plane consistent with the tile-system requirements. Grout is not a substitute for flexible movement sealant. If an existing shower has failing joints rather than a failed pan, UKB’s shower grout repair guide helps distinguish surface maintenance from a waterproofing problem.
Prevent Hidden Water Paths at Benches and Niches
This additional planning section addresses features that can bypass a perfectly built floor. Benches, niches, ledges, and pipe penetrations must return water to the pan without creating flat surfaces or unsealed fastener paths.
Slope every horizontal shower surface inward
Frame and waterproof benches, niche sills, curb tops, and ledges with a slight positive slope toward the shower. Create the slope before waterproofing whenever possible so the membrane itself drains. Tilting only the tile can leave water sitting on the waterproof layer.
Use compatible prefabricated corners, bands, or reinforcing fabric at changes of plane. Avoid fastening accessories through horizontal surfaces. When a penetration is unavoidable, follow the waterproofing and accessory manufacturers’ approved detail rather than filling the hole with general-purpose caulk.
Seal plumbing penetrations as part of the system
Shower valves, body sprays, hand-shower outlets, and pipe penetrations need seals that connect to the wall membrane. Oversized holes hidden by trim plates allow water to reach the cavity. Use approved collars or sealants and keep the substrate close enough to support the detail.
Test the valve and supply piping before closing the walls. A shower pan flood test does not reveal a supply leak inside the wall, so the two systems need separate verification.
Coordinate the Pan With Curbless Access and Glass
This additional design section prevents late conflicts between waterproofing, accessibility, drainage, and enclosure hardware. These choices affect framing and floor height long before tile is selected.
Recess a curbless shower without unsafe framing cuts
A curbless shower may require a recessed subfloor, altered joist bay, low-profile drain, or sloped bathroom area. Never cut or notch joists without an approved structural plan. Confirm the slope can be achieved while maintaining drain elevation, tile thickness, and a smooth transition.
Plan water containment using shower size, spray direction, glass, drain position, and the slope beyond the opening. A zero-height entry is not automatically a water-safe entry if the showerhead sends water toward an open doorway.
Place glass supports before closing the walls
Add blocking for hinges, channels, and support bars in the locations specified by the enclosure design. Mark and photograph the blocking before wallboard and waterproofing conceal it. This documentation helps installers avoid exploratory drilling near plumbing and electrical lines.
Coordinate the glass footprint with the curb and membrane. A door that swings into a raised floor, a channel that lands over a liner fold, or a fastener that penetrates the curb can undo otherwise careful work.
Know When to Hire a Professional
Installing a shower pan is advanced work because plumbing, structure, waterproofing, tile, and inspection requirements meet in one small area. Professional help is especially valuable when the assembly is curbless, located above finished living space, built over damaged framing, or tied to a relocated drain.
Stop when the risk is concealed and expensive
Call a licensed professional when the drain or vent needs modification, the subfloor is rotten, joists require alteration, the selected system lacks a clear detail, or a flood test fails without an obvious cause. Also get help if the household cannot leave the shower out of service long enough for proper cure and test periods.
Ask the contractor to identify the complete waterproofing system, drain type, slope method, fastener zones, flood-test procedure, and inspection sequence. A clear answer to those questions is more meaningful than a promise that tile and grout will keep water out.
Frequently Asked Questions
These concise answers cover the decisions homeowners most often face before and during shower-pan installation.

UKB
Unique Kitchen & baths is a family-owned business that is committed to providing high-quality kitchen and bathroom remodeling, as well as flooring installations at affordable prices.