How to Repair Grout in Shower the Right Way
Cracked or missing shower grout can look like a small cosmetic problem, but the pattern of failure matters. A few worn joints between firmly bonded tiles may be a straightforward repair. Cracks that return, loose tile, a soft wall, a musty odor, or moisture outside the shower point to a larger problem that fresh grout will not solve.
The most important fact to understand before starting is this: grout is not the shower’s waterproofing system. Tile and grout form the visible finish. A properly built shower relies on a membrane, receptor, or shower pan behind and below that finish to control water. New grout can restore a sound joint and make the surface easier to maintain, but it cannot repair a failed membrane or stop an active plumbing leak.
This guide shows you how to diagnose the failure, remove weak material safely, choose a compatible replacement, and recognize the point where a localized repair should become a professional inspection.
Contents
- 1 First, Decide Whether Grout Repair Is the Right Fix
- 2 Why Shower Grout Fails
- 3 Tools and Materials for a Controlled Repair
- 4 How to Repair Shower Grout Step by Step
- 4.1 1. Dry the Shower and Map the Failure
- 4.2 2. Remove All Loose Grout to Sound Material
- 4.3 3. Vacuum, Clean, and Let the Joint Dry
- 4.4 4. Match the Replacement to the Existing System
- 4.5 5. Mix Only What You Can Place in the Working Time
- 4.6 6. Pack the Joint, Then Remove Excess Diagonally
- 4.7 7. Wash at the Product’s Specified Time
- 4.8 8. Seal Changes of Plane With Flexible Sealant
- 4.9 9. Protect the Repair During Cure
- 5 Choosing the Right Grout for a Shower Repair
- 6 Grout or Sealant at Shower Corners?
- 7 Does New Shower Grout Need Sealer?
- 8 Mold, Mildew, and Recurring Dark Grout
- 9 Local Repair, Full Regrout, or Shower Rebuild?
- 10 How to Prevent Another Grout Failure
- 11 When to Call a Professional
- 12 Frequently Asked Questions
- 12.1 Can I put new grout directly over old grout?
- 12.2 Is shower grout waterproof?
- 12.3 Should I use grout or caulk in shower corners?
- 12.4 How long should repaired shower grout cure before it gets wet?
- 12.5 How do I match old shower grout color?
- 12.6 Why does the same grout crack keep coming back?
- 12.7 Does every cement grout need to be sealed?
- 13 Get the Cause Fixed, Not Just the Crack Covered
First, Decide Whether Grout Repair Is the Right Fix
Do not begin by buying a grout color. Begin with a dry shower, bright light, and a careful inspection. The location and behavior of the crack often reveal more than its width.
What you see | What it may mean | Best next step |
One or two shallow voids between solid tiles | Local wear, incomplete original packing, or impact damage | Remove loose material and make a localized repair |
Cracks returning in the same field joint | Substrate movement, tile-bond failure, or an unstable joint | Investigate the assembly before regrouting |
Cracked grout in a wall corner or where the wall meets the floor | A movement joint was filled with rigid grout | Remove the failed grout and use a compatible flexible sealant |
Tile that moves, sounds hollow, or sits proud of nearby tile | Bond loss or damage behind the finish | Stop and have the affected area evaluated |
Soft drywall, swollen trim, stained ceiling below, or damp flooring outside the shower | Plumbing, receptor, or waterproofing failure | Stop using the shower until the source is identified |
Dark growth and a persistent musty odor | Ongoing moisture, inadequate drying, or hidden contamination | Correct the moisture source before cosmetic work |
White powder that returns after cleaning | Possible efflorescence caused by moisture carrying salts to the surface | Investigate why moisture is moving through the assembly |
If the shower has loose tile or evidence of leakage, a professional shower repair assessment is more useful than another surface patch. A repair that fails twice in the same location should also be treated as a diagnostic clue, not a request for stronger grout.
Why Shower Grout Fails
Grout failure is usually the result of stress, moisture conditions, installation variables, or maintenance, not simply age. Common causes include:
- Movement where two surfaces meet
- Grout mixed with too much water or washed too aggressively during installation
- Incomplete joint filling or grout placed over dusty joints
- Using a grout outside its approved joint-width range
- A tile surface that requires a different grout or cleaning method
- Persistent humidity and slow drying
- Structural deflection, loose tile, or deterioration behind the tile
This is why the repair material should not be selected by the words “sanded” or “unsanded” alone. Joint width, tile type, scratch sensitivity, service environment, and the existing grout chemistry all matter. The Tile Council of North America’s grout guidance explains that tile surface, location, tile variation, and joint dimensions should all inform grout selection. It also recommends a flexible material where backing surfaces change and move independently.
Tools and Materials for a Controlled Repair
A localized repair needs more control than force. Gather the materials after you have identified the grout type and reviewed its current technical data sheet.
Useful tools
- Carbide grout saw or hand scraper
- Utility knife with fresh blades for sealant removal
- Shop vacuum with a narrow attachment
- Nylon brush and clean sponges
- Grout float or margin float
- Mixing container and low-speed mixing tool, if the product permits mechanical mixing
- Painter’s tape for delicate tile edges
- Eye protection, gloves, and a suitable dust mask or respirator
Materials
- Replacement grout approved for the joint width, tile, and wet location
- Clean water or the exact manufacturer-specified liquid component
- Color-matched flexible sealant for changes of plane
- Backer rod if required by the joint dimensions and sealant instructions
- Sealer only when the grout manufacturer calls for or permits it
Avoid acids, metal brushes, and aggressive rotary tools unless the tile and installation system have been evaluated for them. A powered grout-removal blade can chip tile edges or reach a membrane quickly in inexperienced hands.
How to Repair Shower Grout Step by Step
The goal is to replace weak material without damaging sound tile, adjacent grout, or the water-management components behind the finish. Product instructions take priority whenever their directions differ from general guidance.
1. Dry the Shower and Map the Failure
Stop using the shower and let the surface dry. Remove soap residue with a cleaner approved for the tile and grout, rinse completely, and provide ventilation. Mark every crack, void, loose tile, and failed corner joint with painter’s tape outside the repair area.
Press gently on tiles near the defect. Movement, a soft backing surface, or water appearing at an adjacent joint means the job has moved beyond a grout-only repair. Moisture meters and infrared cameras can help screen for unusual conditions, but they do not prove the source or condition of a concealed assembly by themselves.
2. Remove All Loose Grout to Sound Material
Wear eye and respiratory protection. Use a hand grout saw or scraper to remove cracked, powdery, and poorly bonded grout. Work along the center of the joint first, then clean the tile edges with light, controlled passes.
The replacement needs meaningful depth to lock into the joint. Do not skim new grout over a thin groove or leave crumbling material underneath. Remove to sound material and follow the replacement manufacturer’s minimum depth requirements. Stop if the joint exposes an unfamiliar membrane, if tile begins to move, or if the defect continues far beyond the area you planned to repair.
3. Vacuum, Clean, and Let the Joint Dry
Vacuum the joint thoroughly. Brush out remaining dust, then clean or dampen the joint only as directed by the grout manufacturer. Residual cleaner, soap, dust, and standing water can weaken the bond or alter color.
Never mix household cleaners. If mold is present, address the water or humidity problem before closing the joint. The EPA’s mold and moisture guidance emphasizes moisture control, prompt leak repair, cleaning hard surfaces, and complete drying. It also recommends professional help for larger or complicated contamination.
4. Match the Replacement to the Existing System
Identify whether the surrounding grout is cementitious, epoxy, urethane, or another ready-to-use formulation. If the original product is unknown, take a sample and clear photos to a tile supplier or contractor rather than guessing.
Color matching is affected by batch, water ratio, cleaning, age, lighting, and sealer. Test the repair in an inconspicuous joint when appearance is critical. A perfect match to weathered grout may require a larger, deliberately bounded regrout area.
5. Mix Only What You Can Place in the Working Time
Measure liquids exactly. Mix at the speed and for the duration stated on the package. Some cement grouts require a resting or “slake” period and remixing; other formulas do not. Do not add water later to revive stiffening grout unless the manufacturer expressly permits it.
Small batches reduce waste and make timing easier. Keep the same liquid ratio between batches to reduce color variation. The LATICRETE cement-grout technical FAQ illustrates why product instructions matter: mixing liquids, scratch risk, cleaning, and suitable flexible-joint locations vary by product and surface.
6. Pack the Joint, Then Remove Excess Diagonally
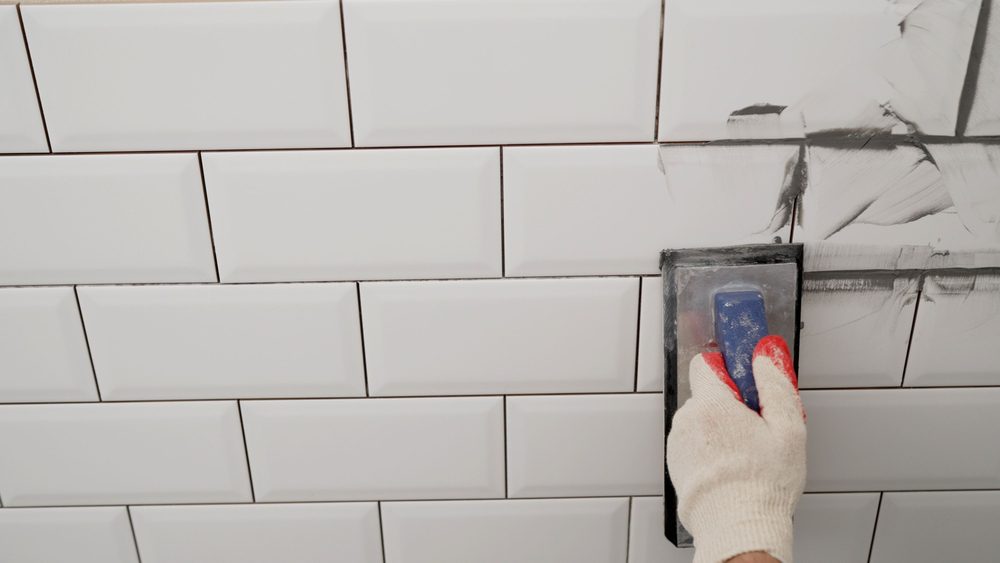
Use a rubber float to press grout firmly into the open joint from more than one direction. The joint should be full, without pinholes or bridges over empty space. Hold the float at an angle and scrape diagonally across the tile to avoid pulling fresh material back out.
Do not place grout in a corner or other designated movement joint. Keep those joints open for the appropriate flexible sealant.
7. Wash at the Product’s Specified Time
Begin cleanup when the grout reaches the stage described in its instructions, not at a universal number of minutes. Use a well-wrung sponge, light pressure, and diagonal strokes. Rinse the sponge frequently and avoid flooding the joint.
Too much water can wash pigment and binder from cement grout, create low joints, and contribute to blotchy color. Remove remaining haze using the approved method after the grout has firmed. Test any specialty cleaner on an inconspicuous area first.
8. Seal Changes of Plane With Flexible Sealant
After removing failed material, clean and dry wall corners, wall-to-floor joints, and other movement locations. Install backer rod where the sealant manufacturer requires it, then apply a wet-area sealant compatible with the tile, substrate, and joint. Tool the bead for continuous contact with both sides without smearing it across the tile face.
Do not bury cracked corner grout under a thin film of silicone. The rigid debris prevents the flexible joint from performing as intended. If the shower is part of a wider renovation, the design and execution of movement joints belong in the scope of a qualified bathroom remodeling contractor.
9. Protect the Repair During Cure
Keep the repair free from water, steam, cleaners, and impact for the full period stated on the grout and sealant labels. Cure times vary with product chemistry, temperature, humidity, joint depth, and application conditions. “Dry to the touch” does not necessarily mean ready for shower service.
If the grout and sealant list different return-to-service times, follow the longer applicable period. Record the product name and batch information for future maintenance.
Choosing the Right Grout for a Shower Repair
No grout category is best for every shower. Use this comparison to narrow the choice, then confirm it against the tile and grout manufacturers’ current instructions.
Grout family | Practical advantages | Watch-outs | Best fit |
Traditional cement grout | Familiar installation, broad color availability, repairable | Water ratio and washing affect strength and color; some products benefit from sealer | Repairs where it matches the existing cement-grout system |
High-performance cement grout | Often denser, more color-consistent, and approved for a wider joint range | Mixing and cleaning windows can be strict; sealer requirements vary | Busy showers when product compatibility is confirmed |
Epoxy grout | Low absorption, stain resistance, no penetrating sealer needed for many products | Shorter working windows, more demanding cleanup, higher material cost | Full sections or installations designed for the selected epoxy system |
Premixed or single-component grout | No water-ratio error and convenient small batches | Cure and water-exposure rules differ; not interchangeable with every existing system | Small repairs when approved for continuous wet-service conditions |
For marble, glass, polished tile, or a soft glaze, make a scratch test. Sand or aggregate size that is acceptable on porcelain may mark a delicate surface. Joint width also matters, but the approved range printed in the selected product’s data sheet is the deciding specification.
Grout or Sealant at Shower Corners?
Use grout in stable joints within the same plane. Use an appropriate flexible sealant where planes or backing surfaces meet, including vertical wall corners and the wall-to-floor transition, unless the engineered system specifies another movement-joint detail.
The distinction is functional. A corner concentrates movement from framing, temperature change, and normal building behavior. Rigid grout resists that movement until it cracks or transfers stress to tile. A correctly designed sealant joint accommodates movement and can be renewed as a maintenance item.
Choose a wet-area sealant suitable for the materials and exposure. “Color matched” describes appearance, not performance. Acrylic painter’s caulk is not a substitute for a product approved for the specific shower joint.
Does New Shower Grout Need Sealer?
Sometimes, but not automatically. Many traditional cement grouts can benefit from a compatible penetrating sealer. Epoxy grouts and some high-performance cement or ready-to-use products may not require one. Sealer can help with stain resistance and cleaning, but it does not turn grout into a waterproof membrane.
Check both the grout and sealer data sheets for compatibility, cure time, application method, and reapplication guidance. Test first on stone and textured tile because some sealers can change appearance or leave residue. If the product says no sealer is required, adding one may create maintenance problems rather than protection.
Mold, Mildew, and Recurring Dark Grout
Surface cleaning is not a cure for a shower that remains wet. Fix dripping valves, slow drainage, failed perimeter sealant, and ventilation problems first. After showering, squeegee tile, leave the enclosure open when practical, and run an exhaust fan long enough to remove humid air.
If the fan is noisy, weak, or not venting outdoors, schedule bathroom exhaust fan repair instead of relying on stronger cleaners. Material selection elsewhere in the room also matters, so review flooring choices for high-moisture bathrooms before a larger renovation.
Do not grout or caulk over visible growth. Clean and dry the surface first. If contamination is extensive, concealed, associated with sewage, or affecting someone with health concerns, follow public-health guidance and involve an experienced remediation professional.
Local Repair, Full Regrout, or Shower Rebuild?
The right scope depends on the cause and condition, not an arbitrary percentage of damaged joints.
Scope | Appropriate when | Not appropriate when |
Local grout repair | Failure is isolated, tiles are firmly bonded, joints are sound nearby, and there is no leak evidence | Cracking repeats, tile moves, or moisture appears outside the shower |
Full regrout | Large field areas have worn or discolored grout but tile and underlying assembly are verified sound | The membrane, receptor, substrate, or plumbing has failed |
Targeted tile and substrate repair | Damage is limited and the surrounding waterproofing can be tied in according to the system requirements | A reliable waterproof connection cannot be made |
Shower rebuild | Failure is widespread, the receptor leaks, framing or substrate is damaged, or the waterproofing cannot be restored locally | A verified surface-only defect can be repaired without unnecessary demolition |
A remodel is an opportunity to correct drainage, ventilation, movement joints, access, and material compatibility together. Explore these walk-in shower remodeling ideas for planning context. If the work changes plumbing, structure, or the shower assembly, review bathroom permit considerations before demolition.
How to Prevent Another Grout Failure
Prevention is mostly about controlling movement, installation variables, and drying conditions.
- Use the grout maker’s exact liquid ratio, mixing process, cleaning window, and cure period.
- Keep movement joints flexible and inspect sealant periodically for separation or cracking.
- Repair plumbing drips and drainage problems promptly.
- Run a properly sized exhaust fan during bathing and after the shower until humidity falls.
- Use neutral, surface-safe cleaners and nonabrasive tools.
- Avoid repeated use of harsh acids, wire brushes, or steam if the tile or grout maker prohibits them.
- Inspect penetrations around valves, fixtures, and doors without assuming surface caulk can compensate for poor waterproofing.
Door hardware and penetrations deserve particular care because fasteners and profiles can affect the tiled assembly. The guide to installing a shower door with a precise fit explains the planning issues around alignment and sealing.
When to Call a Professional
Stop the DIY repair and seek qualified help when you find loose tile, a soft substrate, cracks that bridge several tiles, recurring corner failure, moisture in an adjacent room, a ceiling stain below the shower, widespread mold, or an unknown waterproofing system that could be damaged during grout removal.
Ask prospective contractors how they will diagnose the source, protect or connect to the waterproofing, detail movement joints, select compatible materials, and document cure requirements. The guide to choosing a bathroom remodel professional can help you compare qualifications and scope, not just price.
Frequently Asked Questions
Can I put new grout directly over old grout?
Not as a thin surface coat. Remove loose and contaminated material to sound grout and create the minimum joint depth required by the replacement manufacturer. A skim coat over weak grout has little mechanical support and is likely to fail.
Is shower grout waterproof?
No. Grout can resist routine water exposure when properly installed, but the membrane, receptor, or shower-pan system behind and below the tile is responsible for water management. Sealer does not replace that system.
Should I use grout or caulk in shower corners?
Changes of plane normally need a compatible flexible sealant rather than rigid grout because the surfaces can move independently. Remove failed grout from the joint before installing the sealant according to its instructions.
How long should repaired shower grout cure before it gets wet?
Use the return-to-service time on the exact grout and sealant data sheets. Chemistry and site conditions vary, so a universal 24-hour rule is unreliable. Follow the longer applicable time if the products differ.
How do I match old shower grout color?
Start with the original manufacturer and color if known. Test a small area because age, cleaning, water ratio, lighting, and sealer can change appearance. For a highly visible mismatch, regrouting a complete bounded section often looks more intentional than scattered patches.
Why does the same grout crack keep coming back?
Recurring cracks usually indicate movement, poor tile bond, an incorrectly grouted movement joint, or deterioration behind the tile. Repeating the same surface repair without diagnosing the cause is unlikely to produce a lasting result.
Does every cement grout need to be sealed?
No. Requirements vary by formulation. Follow the grout manufacturer’s current instructions. Some cement grouts accept or benefit from a penetrating sealer, while other high-performance products are designed to be used without one.
Get the Cause Fixed, Not Just the Crack Covered
A lasting shower-grout repair begins with an honest diagnosis. If the tile is secure and the defect is local, careful removal, compatible materials, controlled cleaning, and complete curing can produce a durable repair. If the shower shows movement or leakage, the responsible choice is to investigate the assembly before hiding the evidence.
Unique Kitchen & Baths can evaluate damaged tile, failed joints, ventilation, and the surrounding shower system, then explain whether a localized repair or broader renovation makes sense. Request a bathroom project consultation for a scope based on the condition of your shower.